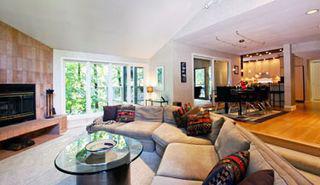
All the preparations you did in the first 3 steps of preparing your home for sale...
- Decluttering, getting rid of your stuff
- Fixups, inspections, painting, etc
- Cleaning

Staging is very different from decorating, where you personalize your home to make it reflect you and fit your lifestyle. According to Wikipedia, the purpose of staging is "to make a home appealing to the highest number of potential buyers, thereby selling a property more swiftly and for more money. Staging techniques focus on improving a property's appeal by transforming it into a welcoming, attractive product that anyone might want."

The reason you stage a home before you sell is to get the most money you can for a very valuable asset. It's really simple and proven............. STAGED HOUSES SELL FASTER!!!
Here are 10 Simple Steps for Staging a Room from Jeri Pischke, a stager I worked with for years who has now retired... thank you, Jeri!
1. Stand in the Doorway. This is where buyers stand before they decide to step into a room. If a buyer won't step in, they won't buy your house. You need to see what buyers see and make changes that will invite them in to every room of the house.
2. Pick a Staging Point. Ask yourself "How will a buyer use this room?" If it's a bedroom, the Staging point is usually the bed....living room could be the fireplace. Then stage the room around this focal point.
3. Make a plan. Once you know what your focal point will be, plan what you're going to change and get started.
4. Clear the clutter. Deaccessorize the entire room. Take out all the pictures, mirrors, and accessories. Get down to the "bones" of the room.
5. Divide into piles. Pack, toss, give away and sell. Some things will go back when you are staging.
6. Get rid of some furniture. Less is more to make a room look larger. Often times we simply move furniture to other rooms.
7. Decide what furniture has to stay. Keep the basics and get rid of the extras. A lot of living rooms have a couch, loveseat and 2 chairs. We often remove either the couch loveseat to make the room look larger.
8. Arrange the furniture the way you want it. Stand back again and see if the room makes "space sense" and it's inviting and easy to walk around. There is no real right or wrong....just keep working with the furniture until the room looks spacious and open.
9. Rebuild with accessories. Bring back in some accessories (often from other areas of the house). Not too many and nothing "personal" like photographs etc.
10. Fine-tune. Stand in the doorway again. Is there anything else you need to do? Anything else that should be removed? Are the blinds/shades straight? Then have a friend come in and look at the rooms again!
Better yet, hire a professionally certified stager to work with you... just ask your Realtor for a referral!
Sharlene Hensrud, RE/MAX Results - Email - Twin Cities Realtor

