Are you familiar with the awesome Hottie Project? If not, go and have a look - it's a neat cause and there are so many ways in which you can participate.
After seeing these gorgeous hot water bottle covers I really really wanted to crochet a few... but to find a pattern... so I made one up and thought I would share the "how to" with you. (Disclaimer: I have made this up and tried my best to record it accurately and in a "user friendly" manner. If you come across any inaccuracies or something that doesn't make sense please let me know and I'll try to remedy it!)
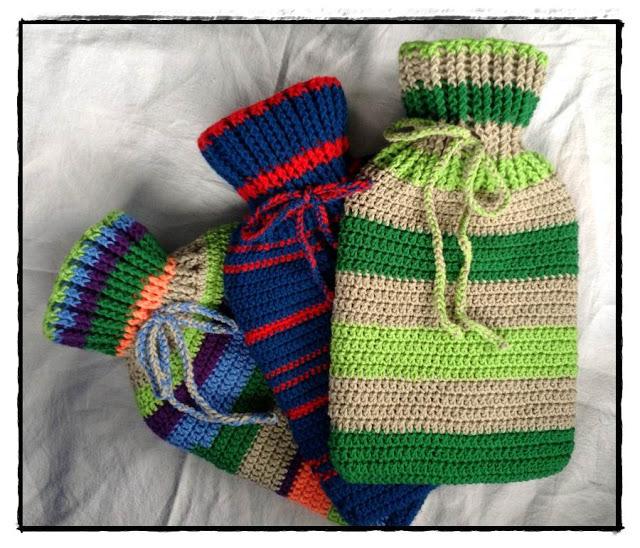
And one more thing before I start: this pattern will fit the size and shape of the hot water bottle I used. You may need to make adjustments to the chain, increases, decreases and number of rows as is appropriate for your hottie. I haven't included number of stitches as the end of rows as it really isn't make or break as long as you are consistent and the number remain more or less the same after row 3.
Materials: Yarn & a 5mm Crochet Hook The pattern can be done with a single strand of yarn (unless you want to change colour), no cuts, breaks, or joining sections together.
Terms:
slip stitch (ss) - put hook in stitch, yarn over, pull the loop back through the stitch and then also through the loop on your hook.
double crochet (dc) - yarn over, insert hook into stitch, yarn over, pull the loop back through the stitch (3 loops on the hook), yarn over and pull through 2 loops on your hook, yarn over again and pull through the last two loops on your hook.
To start: Create a slip stitch and ch 32.
1st Row: Dc into the 3rd ch from your hook,
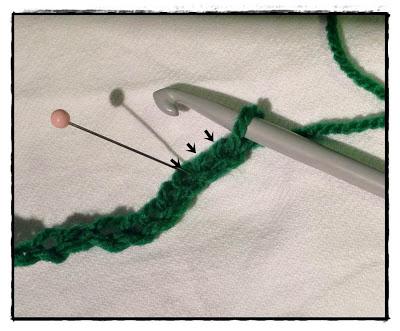 dc in each ch until the second to last ch, 4 dc's into the last ch
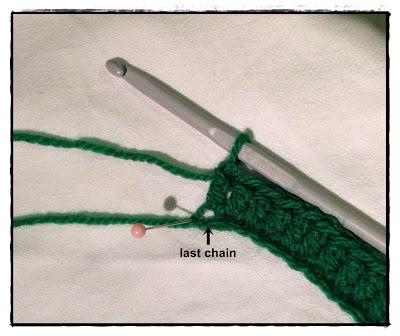 Now we go around the bend... and you will be working on the other side of your initial chain (as opposed to turning your work, chaining and then working across into the dc's you've just made).
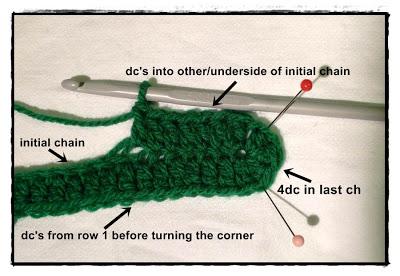 Dc into each chain until the second to last one. 3 dc's into the last ch.
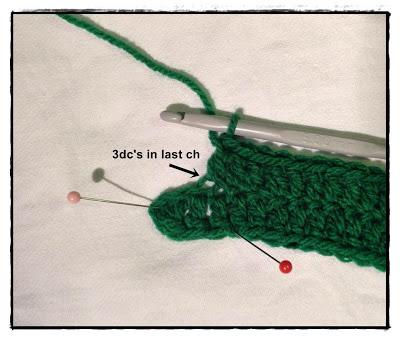 ss into top of initial chain.
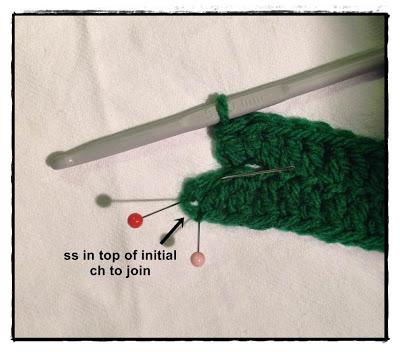 2nd Row: Ch2, 30 dc across, 2dc into next 2 stitches, 1 dc in each stitch across and 2dc into each of the last two stitches. ss to top of initial ch2.
3rd Row: Ch2, dc into each stitch all the way around. ss to top of initial ch 2.
Continue as in 3rd row until desired height is achieved. In my case it was 22 more rows (a total of 25).
Next is the "neck" and top part. You are going to use "front post double crochet" (fpdc) and "back post double crochet" (bpdc) to create a ribbed effect that will "pull the work in" a bit but remain stretchy.
To start: Chain 2. Now we'll do a bpdc.
Yarn over, insert hook from the back of your work into the space below the "stitch".
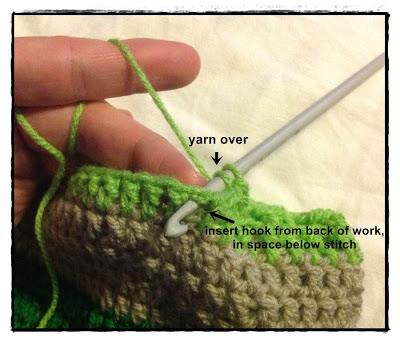 Push your hook back out to the back of the work through the gap on the other side of the "post".
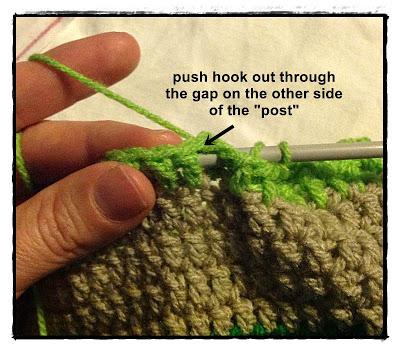
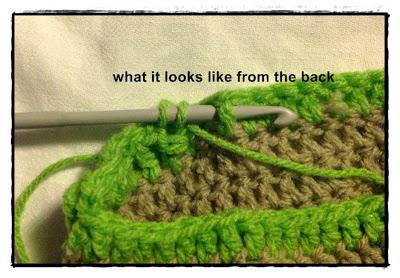 Now yarn over your hook again.
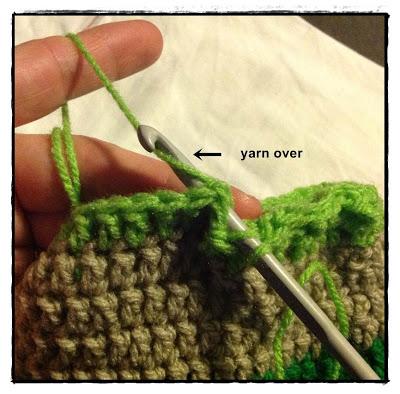 And pull back through (just like you would for a dc). 3 loops on the hook.
Yarn over again and pull through 2 loops. Yarn over and pull through the last two loops.
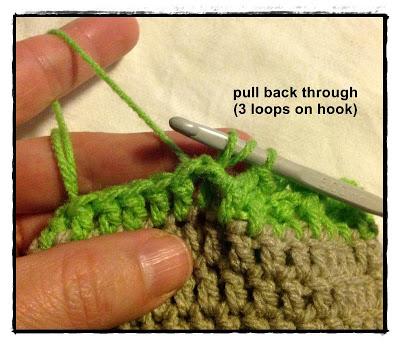 You've just completed a bpdc. Now do another around the next post.
Now we'll do a fpdc for the next two posts.
Start: yarn over.
Insert hook from the front of your work behind the post.
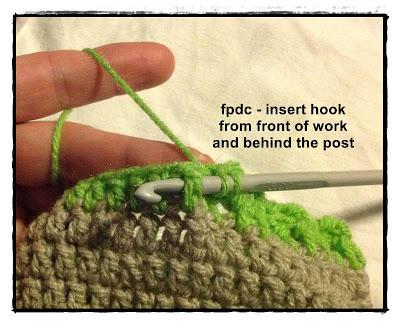 Yarn over, pull the loop through. 3 loops on hook. yarn over, pull through 2 loops. yarn over pull through last two loops on hook.
 Continue this right around: 2bpdc, 2 fpdc. dont worry if you dont have an even amount to complete the pairs. If you come to the end just work whatever comes next.
Once you've finished working around all the posts, ss into the top of the beginning ch2.
Next row: ch 2. Continue working like for like around the posts. ie: fpdc's on fpdc's and bpdc's on bpdc's.
Soon you'll have that lovely ribbed effect.
Once you've created the 'height' needed to cover the whole bottle finish off and work in your ends.
For the 'string', use two strands of yarn and make a chain as long as is needed.
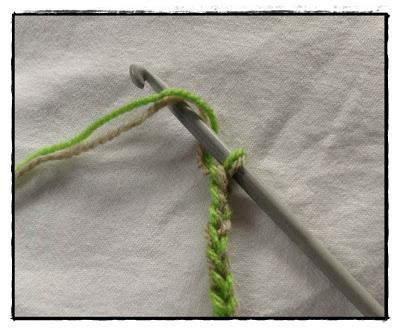 Thread the chain through the gaps beneath the fpdc's.
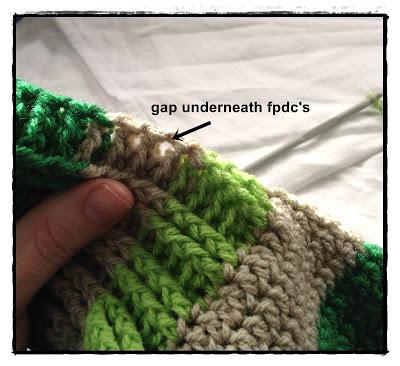 Pop the hot water bottle in, and tie it up.
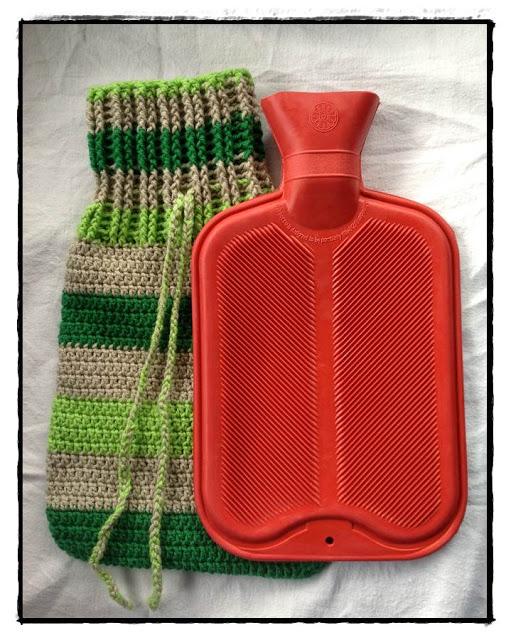 Done!
Done!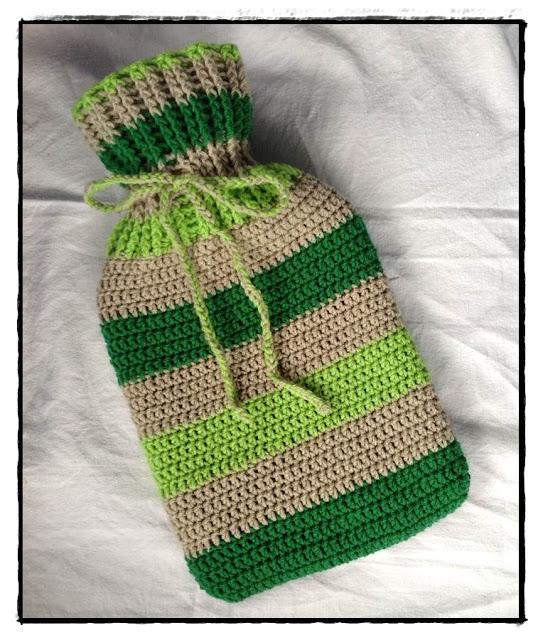 Phew! I hope you're still with me! As an aside I tend to decrease around the 'neck' area as the ribbing allows for some stretch. If you do try it and get stuck please let me know and I'll be happy to help!
For June we have a brand new awesome giveaway! PaperVine was one of the first blogs I followed and I've been a great admirer of Lowri's work. I'm sure you've stumbled upon her creations and no doubt the scrapbookers among you know of her! Well she has an online store selling gorgeous items and this month's winner will win a $40 gift voucher to go wild with at the shop!

Lowri is also offering a 15% shop discount for all you lovely readers during June! Just use the code SUNSHINE at checkout. I hope you agree - it's awesome!
Okay you inspirational lovelies - go forth, link up, be inspired, share the love! And thanks for stopping by and being fantastic!
Have a great Friday Eve!
L xx
