The Raspberry Pi GPIO Control Center application lets you control your Raspberry Pi‘s GPIO pins in some convenient, advanced ways. Designed to be used especially with the Raspberry Pi binary LED clock, it can turn 17 LEDs connected to the GPIO header in 3 groups into a binary clock and it can also run some nifty animations on them. But it can also be used to send signals to any hardware connected to the GPIO pins and to monitor the result through a live webcam feed. All this is accomplished in a web browser. Advanced user management functions protect the GPIO pins from unauthorized access.
Implemented as a Java web application, the Raspberry Pi GPIO Control Center’s user interface is based on the Vaadin framework and it relies on the Pi4J library to control the GPIO pins, which are addressed according to the WiringPi numbering scheme. The general structure of the application and details about how it can be set up are described in the article Controlling the Raspberry Pi’s GPIO pins from a web browser.
The Raspberry Pi GPIO Control Center is organized into 6 modules. Which modules are visible in the web browser depends on the role of the currently logged in user. The modules are the following:
- The login module
- The user management module
- The general purpose GPIO control module
- The animation center module
- The script control module
- The live feed module
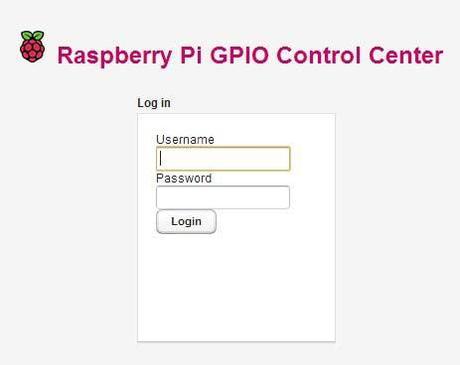
The login module

The login module’s role is to prevent unauthorized access to the GPIO pins of the Raspberry Pi by only allowing predefined users to access the given sets of modules if they authenticate themselves with the correct password. If somebody knows the address of your Raspberry Pi and even the URL with which the Raspberry Pi Control Center can be accessed on it, they still won’t be able to get past the login screen without a correct password. The accepted username/password pairs are defined in the file:
/var/lib/tomcat7/webapps/RPI_GPIO_Controller_Data/users/userdata.txt
This file contains one user per line in the form UserName:Password:UserRole. The data is read from it at application start, so modifying the contents of the file will only have affect after restarting the application. User roles are used to limit the access of certain users to some of the modules of the application. Currently the following user roles exist:
- viewer – Can only see the live feed but cannot start/stop it. Cannot control the GPIO pins in any way. This is basically a limited, read-only user type.
- controller – Besides being able to see the live feed, the controller can access all the GPIO control modules (general purpose GPIO control module, animation center module, script control module) and can change the states of the GPIO pins in all possible ways.
- admin – This is the user type which has all the rights. An admin user can see all the modules, can do everything that a controller can do, and in addition has access to the user management module, being able to log out other users at any time.
The basic principle is not to allow more than one user to control the GPIO pins at the same time. A controller can only log in if there is no other controller logged in. An admin can only log in if there is no other admin logged in. If there is a controller logged in when an admin user logs in, the controller will be logged out automatically. Whenever a user is logged out by another user with higher privileges, the logged out user will be returned to the login screen and notified that he was logged out by the specified other user.
The user management module

This module can only be accessed by admin users. It lists all the existing logged in users and allows an admin to log out anybody at any time.
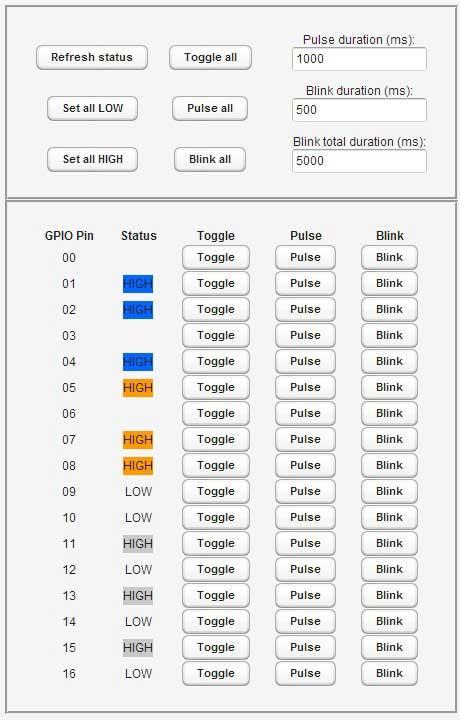
The general purpose GPIO control module

The general purpose GPIO control module makes it possible for controller and admin users to modify the states of the 17 programmable GPIO pins individually or at once, allowing any hardware attached to the GPIO pins to be instructed to change its state. The states of the pins are shown as LOW/HIGH and can be toggled, set LOW or set HIGH. It is also possible to send a pulse with specified duration to the pins or to make attached lights blink for a given time period (the blink duration is is the time for which the pin is set HIGH during one cycle and the total blink duration is the total time to blink the light).
The animation center module

If you are using the Raspberry Pi GPIO control center together with the Raspberry Pi binary LED clock, which is its primary intended use, then the animation center will be your most important module. What it does is basically “playing” predefined animations on 17 LEDs connected to the programmable GPIO pins in 3 groups (hours, minutes and seconds). The animations are implemented in the derived classes of the Animation class and new ones can easily be created by writing a new derived class and overriding some of the methods, out of which Animation::generatePattern() is the most important, as it is called periodically by the Animator object and it generates the next pattern to be displayed.
The Animation combo box lets you select the animation you wish do run. If RANDOM is chosen, the animations will be selected automatically in random succession. Probably the most important animation is the binary clock, which utilizes the Raspberry Pi binary LED clock hardware for its main purpose: displaying time in binary format.
The animations can be started, stopped, stopped instantly (normal stop lets the animation complete its current cycle) and their speed can be increased and decreased (using the Faster/Slower buttons). It is also possible to randomize the speed of the animations, making them less predictable, because some animations may look considerably different at different speeds. The minimum and maximum duration of an animation can also be set. Entering 0 for both values will make the animation(s) run forever. The name of the currently running animation is shown (or “Animation not running” if stopped) and a progress bar shows how much of the animation’s duration has already elapsed. If the animation is running forever then an undetermined progress bar is displayed.
An advanced feature of the animation center module is to run animations based on a predefined script. If the “Automatic actions at specified times” check box is checked, the animation center module will use the contents of a script file to determine when to start or stop given animations. For example, you can tell it (through the script file) to start the binary clock at 9:00 AM and to stop it at 10:00 AM and to start playing random animations at 4:00 PM with durations between 5 and 15 seconds, until 4:30 PM. If you change the script, it can be re-read into memory by clicking the “Re-read settings from files” button. The script file is located at
/var/lib/tomcat7/webapps/RPI_GPIO_Controller_Data/animation/automation.txt
The script control module

If you prefer not to use the animation center, but run the Bash scripts instead (binray clock or light show), you can do this through the script control module, although it is not advised to do it because the Bash scripts us a lot more CPU than the control center module and this can matter on a computer with such low hardware resources like the Raspberry Pi.
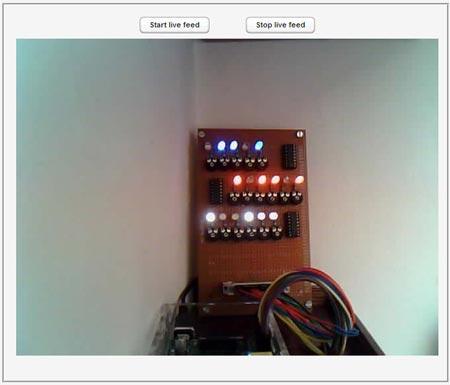
The live feed module

This module is accessible to all users, including viewers, and it is included for the purpose of being able to check the results of the actions in the GPIO control modules (the general purpose one, the animation center or the script control module) from a remote location through a webcam feed. In other words, it provided visual feedback about the GPIO control actions. Detailed instructions about getting the feed to work can be found here. It is possible to stop the feed because it uses a bit of the Pi’s processing power and you might not need the feed anyway.
Prerequisites
The first thing you need to make sure in order to be able to use the Raspberry Pi GPIO Control Center is that you have Apache, PHP and MySQL up and running on your Raspberry Pi. Detailed instructions about how to accomplish this can be found here. Other than that, we will need to install and configure a few things that are needed to run the application:
1. JRE/JDK: Download and install the Java Runtime Environment or Java Development Kitof your choice on the Raspberry Pi (OpenJDK for example: apt-get install openjdk-7-jdk).
2. Tomcat: Download and install Tomcat on the Raspberry Pi (apt-get install tomcat7). Configure it to listen on your preferred port (we will use 8080).
The Pi4J library will need root privileges in order to control the GPIO pins, so Tomcat must run under the user root and under the group root. On the Raspberry Pi edit your/etc/default/tomcat7 configuration file. Find the TOMCAT7_USER and TOMCAT7_GROUP variables and make sure they are both set to root:
- TOMCAT7_USER=root
- TOMCAT7_GROUP=root
Restart Tomcat: service tomcat7 restart
3. The Wiring Pi gpio utility: Must be installed in order for Pi4J to work. Follow these instructions to download and install it.
4. MJPG-streamer: Required for the live feed to work. Follow these instructions to get it up and running.
For additional information about installing and configuring needed applications and/or about how to modify the source code and behavior of the Raspberry Pi GPIO Control Center, read the following article: Controlling the Raspberry Pi’s GPIO pins from a web browser.
Deploying and configuring the Raspberry Pi GPIO Control Center
If you wish to modify the source code and deploy the modified version under Tomcat, read the “Deploying your web application” section of this article. Otherwise, if you only wish to use the application as is, download the WAR file from here and follow these steps:
Step 1: Copy the WAR file to the webapps folder of Tomcat (/var/lib/tomcat7/webapps) onto your Raspberry Pi. For this purpose you can use WinSCP for example.
Step 2: Download the configuration data package from here, unpack it and copy it to the webapps folder of Tomcat (/var/lib/tomcat7/webapps), next to the application WAR file:
cd /var/lib/tomcat7/webapps
wget http://iqjar.com/download/jar/RaspberryPi_BinaryLEDClock/RPI_GPIO_Controller/RPI_GPIO_Controller_Data.zip
tar -zxvf RPI_GPIO_Controller_Data.zip
Don’t forget to change the default user names and passwords provided in /var/lib/tomcat7/webapps/RPI_GPIO_Controller_Data/users/userdata.txt, defining your own users and passwords.
Step 3: Restart Tomcat. This step is most likely not needed, but just in case…
service tomcat7 restart
Give it a minute or two to restart properly.
Using the Raspberry Pi GPIO Control Center
Open a web browser and type in the address bar the following line:
YourDomainOrYourIP:TomcatPort/YourWebApplication
Substitute the values with your own. Examples:
example.com:8080/RPI_GPIO_Controller
1:1:1:1:8080/RPI_GPIO_Controller
Be patient the first time you load your application, it will take a few seconds.
Have fun!
Downloads:
- The complete Java project
- The binary WAR file
- The configuration files


