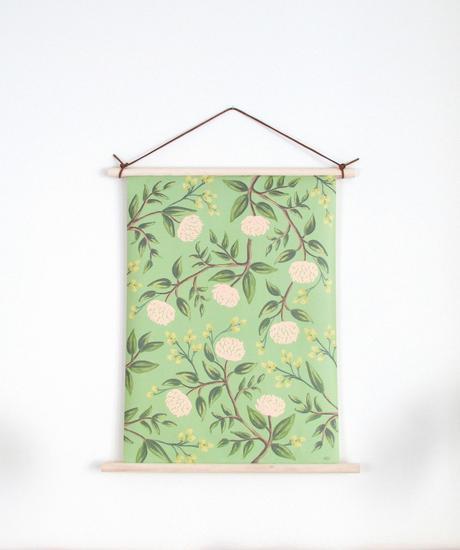
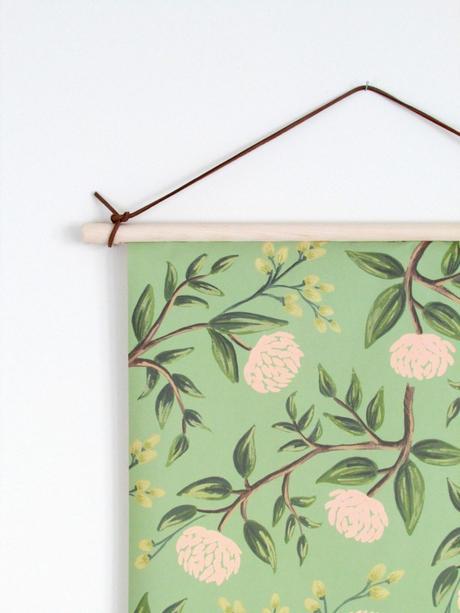
 There are two things I’m loving at the moment: 1.) Vintage botanical wall charts and 2.) Anything Rifle Paper Company. Seriously. Anna Bond is a paintbrush whisperer. I almost bought an art print for our home from her online shop, when I saw her gorgeous Emerald Peonies gift wrap. The scale and spacing of the painterly flowersreminded me of a vintage botanical chart, so I sprung for the gift wrap instead (which was much more affordable than her prints), and created this pretty Spring-inspired botanical wall-hanging using just wood dowels and leather string. Now if only spring would get here…

Materials:
- One 48″ wood dowel cut into two 23″ pieces
- Ruler
- Hack saw
- Hand-held router fitted with 1/8″ bit and the edge guard
- Duct tape
- Sandpaper
- Pencil
- Rifle Paper Co Wrapping Paper: 1 sheet 19″ x 24″
- Gorilla Glue, or any heavy duty glue that expands as it dries
- Cotton swab
- Leather String or twine
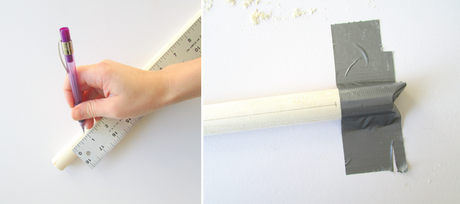
1. Use a straight edge to draw a line roughly 20″ long down the length of each wood dowel, leaving 1.5″ space on each end.
2. Duct tape the ends of the first wood dowel onto your worksurface with your pencil lines from step one facing upward. We did this right on our coffee table, as we live in an apartment, and it’s ridiculously cold outside right now. Just make sure to lay down a drop cloth to catch the sawdust, or prepare to vacuum until you’re blue in the face.
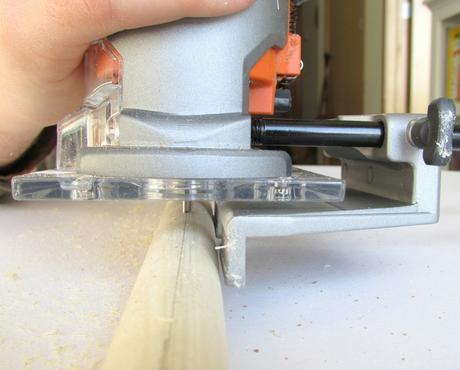
3. Prepare Your Router:
- Attach the 1/8″ dia. bit and the edge guide attachment.
- Adjust the bit on the router so that it protrudes at the bottom by 1/4″ (This is the depth it will drill into your wood dowel.) Also adjust the bit laterally so that it lines up with your pencil line and edge guide.
4. Route your way from one end of the dowel to the other, using your pencil line as a guide, and making sure the edge guide stays right up next to the dowel. Repeat with 2nd dowel. Don’t worry if your routed lines aren’t perfectly perfect. Once you attach the paper, you won’t even see the lines.
Note: I’m using a router because I want to see the wood dowel at the top and bottom like a vintage science chart, but if you don’t have a router, you can simply wrap the paper around the wood dowels and adhere in place with glue.
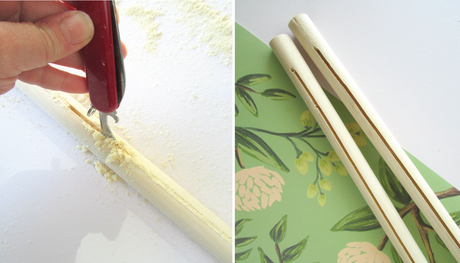
5. Use a pointed object to clear out the sawdust from the slits.
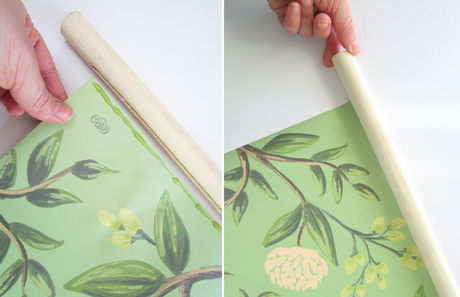
6. Apply a line of Gorilla Glue to the very top edge of one end of the paper and carefully insert into one of routed dowels. Gorilla Glue is best because it expands as it dries filling up the entire slit, making sure the paper is securely adhered to the wood dowel. Use a cotton swab to remove any excess glue.
7. Use your thumb and pointer finger to rotate the dowel slightly toward the paper to ensure the glue adheres to the inside of the slit. Allow glue to dry.
8. Repeat steps 6 & 7 for the 2nd dowel.
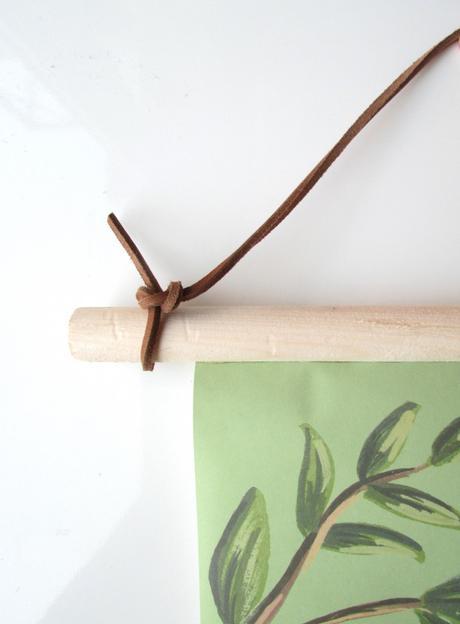
9. Double knot leather string to each end of the top dowel.
