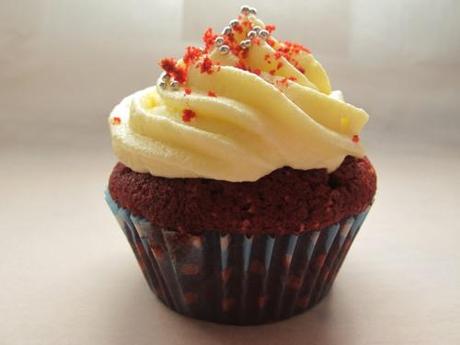
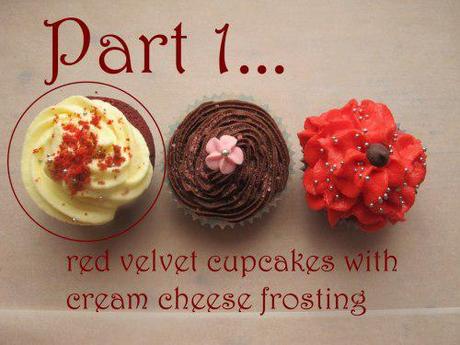
This is a three part post with three various types of cupcakes. Meet today’s star – Miss Red Velvet with Cream Cheese Frosting.
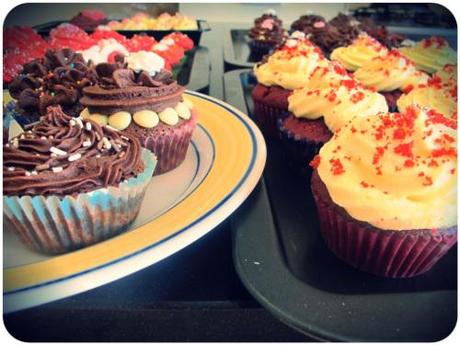
Why so many cupcakes? And believe me there were A LOT of cupcakes (hence the two week absence from blogging).
It’s because I’ve turned the big three-oh.
So I’ve made red velvets, and chocolate mud cupcakes with chocolate buttercream frosting, and butter cupcakes with red cream cheese frosting.
I’m not really talking about the big three-oh. Have mixed feelings.
So I did what I did best, and baked my feelings.
Tenille, from many of my other cooking adventures helped. Making cupcakes just wouldn’t be the same without you Tenille. Thanks again.
Once I fed all my friends these cupcakes I asked a few which ones they liked best.
These are the favorite.
I found them on Geni’s awesome blog Sweet and Crumby. She makes me laugh, you should go have a look.
In fact I actually had a quick email exchange with Geni on cupcakes before undertaking this adventure. Below are Geni’s notes on piping swirls. This is this the first time I ever managed to do it well enough to photograph.
So listen to Geni.
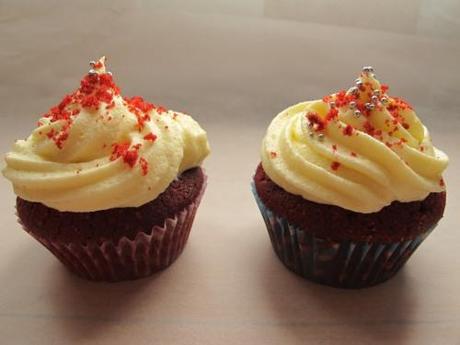
I hope you don’t mind me stealing your words below Geni. If you do, shall we call it a birthday present and move on? Thanks!
I also got a Kitchen Aid, an ice cream maker and a bunch of other awesome baking things for my birthday.
Over. The. Moon.
Many more posts to come. But for now, let’s make cupcakes and not talk about my age. Ta.
Note on my new Kitchen Aid and baking (which I am so excited about): If you have come to this blog sans Kitchen Aid, never be put off. I made the last 75 recipes here with a $9 pair of hand held beaters, and the below cupcakes. In London, where I started this blog, I hand whipped things as I didn’t have beaters. There was a life, and fantastic baking, before these inventions.
My instructions will always be erring on those without the appliances, purely because it used to make me pull a face with jealousy that I couldn’t afford them. That’s real talk.
Ingredients
Cupcakes
60 grams (4 tablespoons) unsalted butter, at room temperature
3/4 cup sugar
1 egg
3 tablespoons unsweetened cocoa powder (best quality you can afford)
2 tablespoons red food colouring
1/2 teaspoon vanilla extract
1/2 cup buttermilk
1 cup plus 2 tablespoons all-purpose flour
1/2 teaspoon salt
1/2 teaspoon baking soda
1 1/2 teaspoons distilled white vinegar
Cream cheese fosting
280 grams (10 ounces) cream cheese brought to room temperature
113 grams (1 stick) butter, softened
1/2 teaspoon pure vanilla extract
2 1/2 cups sifted icing (confectioners’) sugar (you can add more if needed)
Method
Cupcakes
- Preheat your oven to 180C (325F) degrees. Line a muffin tin with cupcake cases and spray with oil. Beat together the butter and sugar until creamy and fluffy…about 1-2 minutes. Add the egg and beat on high another minute.
- In a small bowl, make a paste with the cocoa powder, red food dye and vanilla. Add it to the butter mixture and cream together on medium speed until well incorporated.
- In a medium sized mixing bowl, whisk together the salt and flour. Alternate adding in 1/2 the batter and 1/2 the buttermilk, mixing in between and scraping the sides and bottom of the bowl until well combined and the color is the same red throughout the batter.
- With your beaters on low speed, add the baking soda (sprinkle over entire batter to disperse) and vinegar and mix just until combined.
- Fill each muffin cup until 2/3 full. Bake cupcakes for about 20-25 minutes or until lightly firm to the touch and a toothpick comes out clean. For mini sized cupcakes, bake for about 12-14 minutes. Cool on rack. Wait until entirely cool to frost cupcakes.
Cream cheese frosting
- Beat together cream cheese and butter until creamy and smooth.
- Add vanilla and SIFTED icing sugar. Beat on medium and then high until smooth. You want your frosting a bit stiff if you are going to pipe it. So keep adding 1/4 cup of powdered sugar until it is creamy but a little firm.
- Refrigerate your frosting for a good 1/2 hour or so before piping.*
Garnish: Crumble a third or a half of one of your cupcakes into smithereens so the crumbs are fine. Use these crumbs to top your frosted cupcake. It’s OK, you wanted to try one anyone, so eat the rest.
How to pipe swirls (courtesy of Geni at Sweet and Crumby)
*Always refrigerate your frosting first for about a 1/2 hour before piping with it. It will firm up and your swoops will hold much better.
- Snip about 1/2 inch off of a pastry bag to begin and place your plastic coupler inside the cone. Place your favorite tip on the outside of the bag over the coupler and use the coupler’s ring component to screw it on over the tip.
- Take your pastry bag and place it in a tall glass/tumbler point side down. Open up the bag and pull about an inch or so of the bag up and over the top outside of the glass to open up the pastry bag.
- Carefully scoop your frosting into the bag and fill it within two inches of the top. Fold the top corners of the bag in and roll/fold up the bag to contain the frosting. Pinch/grip tightly at the top of the bag as you hold down the folded edge and pipe.
- Start making your swirl at the outside of each cupcake and work your way to the center. You will be amazed how good they look and how easy it is to do. Sprinkle with red sprinkles or any sparkly topping you wish.
Cupcake info I wish I knew years ago
The larger the tip the better. It makes much prettier swirls and swoops and it is MUCH EASIER to pipe with the big gun tips. I found one of these in a regular old kitchen shop, and it really did make my life so much easier. I’ve tried with smaller tips and failed previously.
Makes: 12 regular cupcakes or 24 minis.
Storage: They freeze well, otherwise best eaten within a couple of days. Store in airtight container. I did freeze them two weeks before my party. Shhh. Don’t tell the guests.
Source: Sweet and Crumby, who had it from Joy the Baker, taken from the Hummingbird Bakery Cook.
