This German cake can be found within the pages of the 'Special Cakes' section. Mary says that Nusskuchen comes in many forms. The only version I'd previously been aware of is a traybake style sponge with a nutty crumble topping. Mary's version was completely different and I found it hard to visualise. Oh to have a picture for every single recipe! Thankfully I found a photograph in another of my Mary Berry baking books. The cake looked fairly unusual and I wouldn't describe it as pretty! The sponge layers were remarkably flat. I was glad to have seen this picture before starting to bake; otherwise I would have thought a flat cake to be a disaster!!
The day started off gently enough with a trip to the hairdresser’s. After a quick trim and a light hearted natter I met up with Neil and Isaac at the park. I sat on the bench and watched Neil run around like a mad thing kicking a football. Isaac seemed bemused by all the activity and was more interested in the skateboard ramp. He was determined that it could be used as a slide; frustratingly the wood offered too much friction!!
It wasn't until late afternoon that I summoned up the energy to start my baking session. I read through the entire recipe and decided it shouldn’t take as long as I'd first feared. However, it certainly wasn't as simple as one of Mary's all-in-one recipes! I was very eager to get the first task out of the way. I estimated that roasting and grinding the shelled hazelnuts would take longer than making the cake itself! After the hazelnuts had been in the hot oven for ten minutes, I rubbed off their skins. I found it easier to remove them after they'd cooled for a few minutes – this also helped to eliminate burnt fingers! Next came the boring bit. I do not own a food processor, so had no choice but to grate the hazelnuts finely by hand. Twenty minutes of mind numbing boredom passed before I had finished. Never again! At least once I had completed the tedious task I could move on to the fun part of actually making the cake – yay!
I measured a surprisingly small quantity of butter and sugar into a mixing bowl and used my electric whisk to beat the mix together until suitably light and fluffy. Next I needed to separate the eggs. I rummaged in the drawers and, in my haste to pull out a bowl, managed to drop a cake tin down the back of the cupboard. It was wedged! I almost fell into the drawers as I reached to the back to tug it out. Hot and flustered, but with the tin finally unwedged, I could carry on and separate the eggs! The whites went into the clean bowl ready to be used later while the yolks were beaten into the creamy buttery mixture.
After spending ages grating the hazelnuts I had developed a real dislike of them. It was with reluctance that I stirred them in to the creamy mixture. The addition of coffee was a surprise. There are quite a few flavours in this cake! It took mere seconds to dissolve the tiny amount of coffee into a small quantity of warmed milk. Once this had been poured into the mixture I could fold in the flour. I was left with a VERY stiff mixture. It resembled a thick paste! I hoped the addition of the egg whites would help to loosen things up. I whisked the whites until they reached soft peak stage, and then folded them in as gently as I could. It really wasn't easy as the mixture was impossibly thick. Once combined I could spoon it into the waiting deep tin. I had barely enough to cover the bottom. I couldn't understand why I was instructed to use a deep tin!! While the cake cooked I got on with the apple filling.
Not many dessert apples were required so it didn't take too long to peel, core and slice them. Mary says to cook until the apples are soft but still hold their shape. I therefore made sure that I sliced them fairly thickly. Once they were in a saucepan I added some apricot jam, lemon zest and juice. With the lid firmly in place I cooked the apples until just tender. This only took ten to fifteen minutes so I was soon ready for a sit down.
After a brief rest it was time to take the cake from the oven. While there was no denying that the cake had risen, it was still almost as flat as a pancake! When I tipped it out I wondered how on earth I'd be able to slice it in half horizontally. Surely it would all end in tears! While the cake cooled I gave Isaac his tea. Unfortunately his eyes clocked the tempting treat sitting on the wire rack. For some reason he was no longer keen on his Marmite on toast!
I was forced to listen to calls of “cake” and “want cake” as I very carefully and very gingerly sawed the sponge in half. I couldn't believe it when it actually worked. I put it down to its being such a firm cake. Now it was ready for the apple filling. I think it could have done with a more generous filling – it just didn't seem enough to me. Once the sponges were sandwiched together it was time for the chocolate – woo hoo! As I only required 50g, I let the microwave take the strain. Within moments I had a little bowl full of delicious melted chocolate. There was just enough to cover the surface of the cake with a very thin layer. Finally the cake was complete.
I was too impatient to wait for the chocolate to set completely before cutting several slices. Neil had his own while Isaac and I shared. Isaac loved it, so Mummy wasn't left with much! Neil said he wasn't too sure about all the flavours. He thought they were competing with each other. True, there was a strong hazelnut flavor along with the bitter coffee in the sponge, the tangy apple filling and the thin layer of plain chocolate on top. However, I thought they went well together and I could taste each clearly. I thought it resembled a Jaffa cake but an apple version of course! Maybe that is why I enjoyed this cake so much, as I do have a real thing for Jaffa cakes!

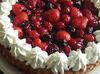
My pancake cake!!!! ;-)