It’s always a good idea to have all of your important data backed up and, if you have an iPhone, iCloud automatically backs up your device whenever you’re connected to a Wi-Fi network. When you sign in to iCloud, you get 5GB of storage and if you run out of space, you can always upgrade your storage plan or decrease the size of your e.g. Camera Roll or apps backup.

Store your important documents on iCloud.
iCloud stores everything for you, from purchased music, movies, apps etc. to ringtones and iMessages. If you’re not already familiar with the process, read on to find out how to enable iCloud backup and store your data on a virtual cloud.
1. Go to Settings>iCloud.
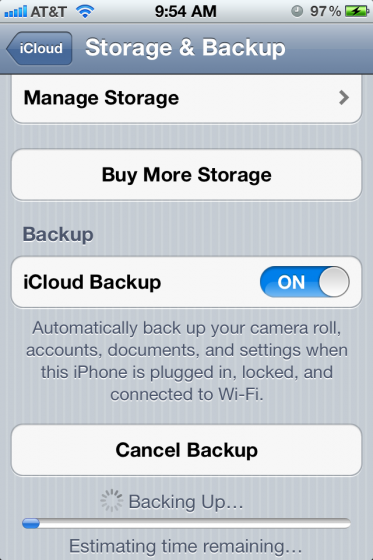
2. Once there, tap on the Storage & Backup tab.
3. To enable the iCloud Backup, slide the switch to On in the box that says iCloud Backup.
4. Your accounts, documents, Camera Roll and settings will all be backed up.
5. You will be informed of the estimated time the backup will take. A bar indicating the progress will appear and above it Cancel Backup, in case you change your mind.
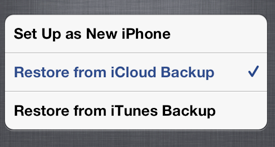
If you buy a new iPhone, you’ll be able to restore your data from iCloud Backup during the setting up.

Get back all of your data from iCloud easily!
To buy more iCloud storage, you need to go to Buy More Storage in the Storage & Backup tab. You get to choose an upgrade and when you do, a tick appears next to it and then all you have to do is tap Buy in the top right corner. If you purchase additional storage by accident, don’t worry, you have 15 to 45 days to get a refund.

