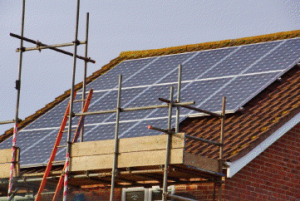
There’s a continuous search for new forms of energy as fuel prices continue to rise. Lowering your dependence on various types of traditional fuel sources is not only environmentally responsible, but it can also save you significant amounts of money. Today, 78 percent of our fuel, including electricity to our homes, comes from fossil fuels. As these fuel prices continue to rise and concerns grow about the environmental effect of their retrieval, looking to other natural and clean forms of energy is becoming popular.

Solar panels are becoming a favorite among green energy sources, due in part to the fact that new technologies capturing solar energy are rapidly reducing the cost of solar energy per kilowatt-hour. Solar systems are also durable, typically lasting 20 to 30 years before needing any significant maintenance. A standard system check once a year will make sure everything is doing what it’s supposed to do, but maintenance requirements are still minimal. Of course, the initial investment in changing to a full solar system isn’t cheap. However, there are several low-cost options for thrifty and DIY environmentalists who want to try their hand at making their own solar panels.
Making your own solar panels
It isn’t rocket science, but making your own solar panels takes time, patience, and some items you won’t find in your local hardware store. Here are the steps you need to follow:
Step 1: Frame
Using plywood and tile spacers, build a template for your solar panel. Tile spacers will help keep your solar cells spaced evenly apart. Build a frame for your template using more plywood and attach the frame using a staple gun. Sand it down to remove imperfections and paint the frame using two coats of deck and siding paint to protect from UV rays and rain.
Step 2: Assemble the cells

While the paint dries, begin assembling the solar cells. You will need tabbing wire and a soldering iron to connect the cells. As you piece them together, remember the bottom of the cell is positive and the top is negative. Piece together as many solar panels as you want, keeping them spaced evenly using the tile spacers to keep them even. Using the same method, create as many strings of solar cells as you need fit your frame in both height and length. Use a bus wire at the end of each string to connect the strings of solar cells into one long string. Check the voltage and current of the cells as you go.
Step 3: The pegboard
The pegboard will be connected to your frame and is necessary for wiring your solar panel. Place your cells on the frame to get an idea of where you will need to drill specific holes to help with wiring. Screw the pegboard down and drill two holes at the end of the frame for the positive and negative connections.
Step 4: Gluing the cells
Using a silicone gun, glue the solar cell strings down to the pegboard. After the glue is set, solder the bus wire to bond as many strings of solar cells as you have together. After you solder the bus wire, check the voltage and current to make sure your connections are good. Once the bus wire is soldered, prepare your gauge wires (positive and negative) to be connected to the end of the bus wire. Test the cells using a battery, a charge controller and an inverter.
Step 5: Acrylic glass
Secure the acrylic glass using screws. Using a dull drill bit — drill against concrete to dull the bit — pre-drill holes in the acrylic glass to keep it from cracking when you secure the screws.
Step 6: Install the junction box
Install and wire the junction box in a place near the frame. The junction box should include a blocking diode to prevent backflow.
There you have it! Test your solar panel, hook it up and start collecting the sun’s free energy.

