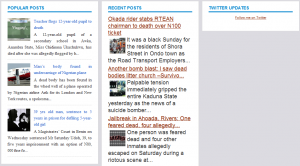
HOW TO CREATE A 3 COLUMN WIDGET IN YOUR BLOGGER FOOTER:
Have you ever seen a three column widget in any blogger blog that you wonder how the owner did it? Well it is quite easy and on our today tutorial, we will learn the simple basics. For all you friends who want to learn this just get your brain down and let’s start.

CREATING A THREE COLUMN WIDGET IN BLOGGER BLOG FOOTER
First login to your blogger dashboard and click template. The first thing to do is to backup your template you can see this by the top right hand side. See screenshot below

The reason we are backing up our template is for safety purposes, so if you’ve backed up your template let’s proceed!
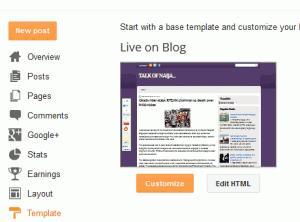
Are you still at the “template” interface? Ok! Now click the “Edit HTML” button. See the screenshot below.

If you have clicked Edit HTML, you will see something like the screenshot below pop up

Now click “Proceed” to take you to your HTML editor. Here is where we’ll put the widget code
To make this process more easy press “ctrl+F” now search for ]]></b:skin>
Just before the ]]></b:skin> paste the below code
/* -----   LOWER SECTION   ----- */

#lower {

margin:auto;

padding: 0px 0px 10px 0px;

width: 100%;

background:#dcdbe1;

}

#lower-wrapper {

margin:auto;

padding: 20px 0px 20px 0px;

width: 960px;

}

#lowerbar-wrapper {

border:1px solid #DEDEDE;

background:#fff;

float: left;

margin: 0px 5px auto;

padding-bottom: 20px;

width: 32%;

text-align: justify;

font-size:100%;

line-height: 1.6em;

word-wrap: break-word;

overflow: hidden;

}

.lowerbar {margin: 0; padding: 0;}

.lowerbar .widget {margin: 0; padding: 10px 20px 0px 20px;}

.lowerbar h2 {

margin: 0px 0px 10px 0px;

padding: 3px 0px 3px 0px;

text-align: left;

color:#0084ce;

text-transform:uppercase;

font: bold 14px Arial, Tahoma, Verdana;

border-bottom:3px solid #0084ce;

}

.lowerbar ul {

margin: 0px 0px 0px 0px;

padding: 0px 0px 0px 0px;

list-style-type: none;

}

.lowerbar li {

margin: 0px 0px 2px 0px;

padding: 0px 0px 1px 0px;

border-bottom: 1px dotted #ccc;

}
Have you pasted the code? Now search for tag, right above it paste the below code
<div id='lower'>
<div id='lower-wrapper'>
<div id='lowerbar-wrapper'>
<b:section class='lowerbar' id='lowerbar1' preferred='yes'>
</b:section>
</div>
<div id='lowerbar-wrapper'>
<b:section class='lowerbar' id='lowerbar2' preferred='yes'>
</b:section>
</div>
<div id='lowerbar-wrapper'>
<b:section class='lowerbar' id='lowerbar3' preferred='yes'>
</b:section>
</div>
<div style='clear: both;'/>
</div> </div>
Now save your work and you have successfully created a customize 3 column widget for your blogger footer.
Now go to your layout Element and start using the features you just unleashed.
Do you have any question regarding this topic, then use the comment box below to drop them for your comments are highly welcomed.
If this post is of value to you, do click the like button, share us and don’t forget to recommend us to friends. For post on the go, don’t forget to subscribe to our feed.

