Ability to Repay in MortgageDashboard
Read the Transcript:
“Hi, I’m Danielle and I am the compliance director at MortgageDashboard. Today, we’re going to look at the Ability to Repay requirements. The CFPB issued the Ability to Repay requirements that went into effect this last January. In response, MortgageDashboard implemented a “Debts, Income & Assets Worksheet”. You can access this worksheet on page 2 of the 1003 in MortgageDashboard. There are three tabs associated with the worksheet: debts, incomes & assets. At the top of the Debts page, you’ll notice the borrower’s income. This is actually fed from the income tab. You don’t need to do anything with it.
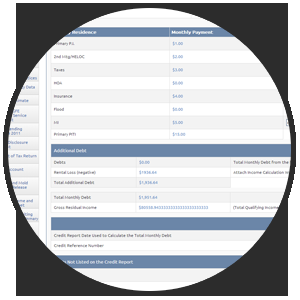
The second portion of the screen is the primary residence. It shows the principle, interest and escrows that are associated with that mortgage. If this is a primary residence transaction, you probably don’t need to complete this important documentation for this section. But for a second home or investment property, you’ll need to complete this section to show anyone who looks at the file after you how you calculated this information. In this example, we had a statement from the previous mortgage company and we have the date of that statement. Now, we know what the principle and interest is currently and how the interest is calculated today.
The next section shows additional debts. It goes on to show the credit report date and the credit reference number. It goes on to debts not listed on the credit report. If your borrower happens to have alimony or child support or other debts that show up on the credit report, the information will show and you can see the supporting documentation information for that debt. For alimony or child support, you might document a divorce decree. At the bottom of the page, there’s a notes section. With all loan files we’re qualifying it’s important to show how you calculated and qualified the borrower. This notes section supports that.


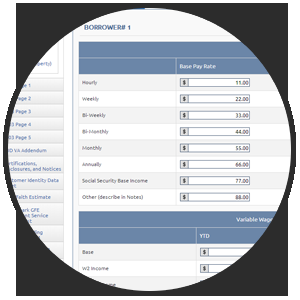
Next is the income tab. Here for the borrower you can see the monthly wage income as well as any variable or other income. In the first section, the monthly wage earnings, you can input your borrower’s base rate of pay. In this example, our borrower is paid $3,000 by-monthly. You can also input your income calculation. In this example, we use “3000*24/12″ which means a qualifying income of $6,000 for that borrower.
If your borrower has variable wage income such as bonus income, commissions, overtime, or other income they receive regularly (and wish to use to qualify), they can put that information in the Variable Wage and Other Income section. You’ll add the year-to-date amount, followed by the previous year and the year before that. After entering the number of months to average, the system will calculate the qualifying income. In this example here, the borrower is receiving a $100 in other income. Perhaps, it’s alimony or child support. They’ve received $300 so far this year as well as $1200 the previous two years. Dividing that by 27, the system will calculate $100 a month. All of this calculates to $6100 a month based on prior input.
If your borrower is self-employed, you can add that information in the next section. It will calculate the borrower’s self-employed qualifying income. There’s also another notes section so you can put information in such as pay stubs and other documentation you used to support the income calculation. You can repeat the same information for borrower 2 in the section below.
Lastly, we’ll discuss the assets tab. This tab supports all the assets the borrower used to qualify and allows us to put the supporting documentation for those assets. For example, for a checking account you can add a bank statement, the number of months you received and the bank they were from. The account number and balance will auto-populate based on earlier input in MortgageDashboard. You can do this for certificates of deposits, multiple checking accounts, any trusts or mutual funds, or retirement accounts. This supporting documentation will allow anyone looking at your file to know exactly how you calculated that information. Just like with the prior screens, there is a notes section. This will allow you to add any notes that tell the story of how the loan was qualified.
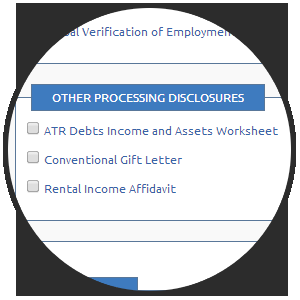
Once you’ve made all this information, you are able to print the form and put it in your loan file. To do this, click “forms” then “print custom document set”, the “processing” tab, and the checkbox next to “ATR Debts Income and Assets Worksheet” under “Other Processing Disclosures”. Generate the file and you can put it in your loan file. If you have any questions, feel free to contact Cody Miles at [email protected]. Thanks!”

