Adding button to your blog doesn’t seem too complicated as I thought it would be. You don’t need to be that genius and techy to come up with a button and a grab box which you can display on your blog sidebar or on any of part of your web page. As a matter of fact, I find it rather easy and if a novice like me can, I’m sure you guys can do better.
What is a Blog Button?
Blog buttons are obvious and techy way of telling your readers and visitors ” Hey! Grab my code and I’ll grab yours!” kinda thing. Bloggers from different platforms would love to exchange links with other bloggers. This is how things run here. If your button is displayed on another blog site, chances are, visitors from that site might notice you and when the button is clicked, they will be directed to your site. Instant traffic right? How cool is that?
Since I don’t have professional web design background, just like many Internet users, I usually run to Mr. Google to ask for help. My search didn’t end up in vain because I finally came up with my own button which you can see on the lower right sidebar of my blog along with a grab box that displays the code which you can copy and paste to your text or HTML widget should you decide to exchange link with me. In this post, I will show you how I added button and grab box to my WordPress blog.
How To Make A Button For Your Blog?
For you to add a button to your blog, you need an image. There are many applications and sites where you can upload your desired image to run on some effects, sizing and cropping stuffs. Usually, buttons are 125 x 125 pixels but you can use other pixel sizes if you want to.
Some used other apps and sites to adjust their image then upload it to their site but since I used a previously uploaded image resized to thumbnail which is attached to the page, it saved my time. So what I did….
1. Open the image
2. Copy the image URL from your browser as shown in the screenshot because you’re going to paste it later on to make the code.
Please note that the dialog box may vary because I’m using an iPad Mobile WordPress app. I don’t know if this would work the same way as other computers. I hope it does. If it doesn’t, figure it out yourself and use an application you are comfortable with.
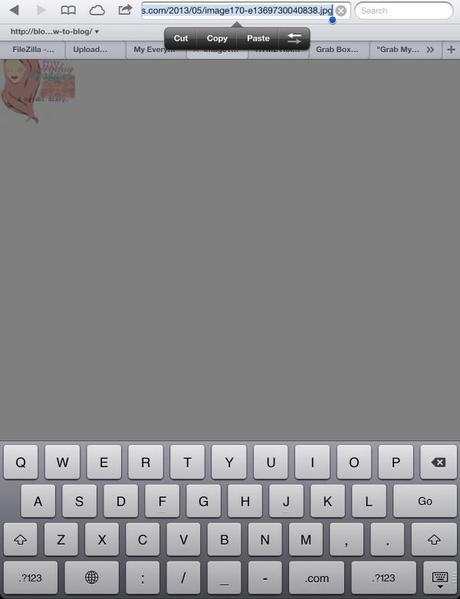
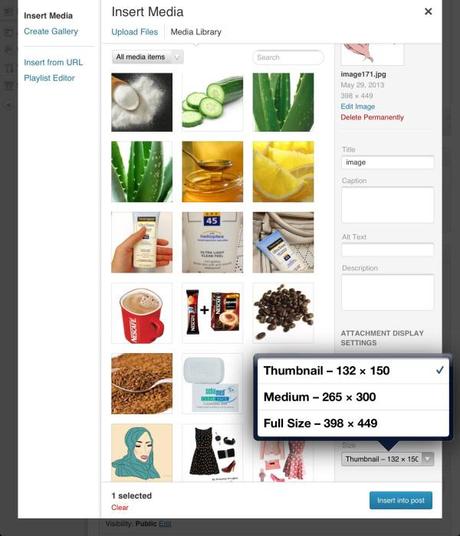
If you will upload an image for the first time and will attach it to a post or page, make sure to adjust the size on the media setting to thumbnail. That will be fine. Thumbnail size will just came out right. Again, copy paste the image URL.
How To Add Grab Box To Your Blog?
Now that you have already your image ready. Your next move would be to generate a code for your button. That was so hard for me to figure out then until I found www.mycoolrealm.com, a very cool site which will do the job for you. Generating the code is as easy as 123. All you have to do is:
1. Enter your blog title
2. Enter your blog URL.
3. Paste the image URL .
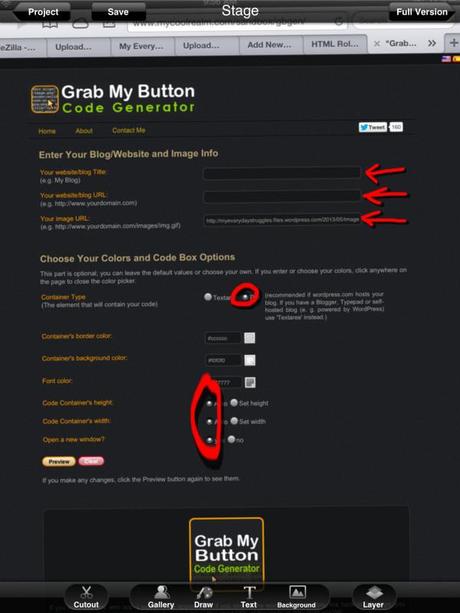
You can preview how the button looks like and adjust if necessary.
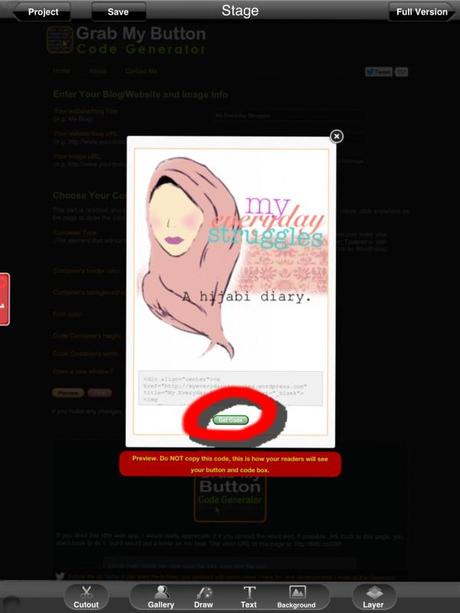
If you’re satisfied with your button, get the code and copy paste it on your Text or HTML widget.
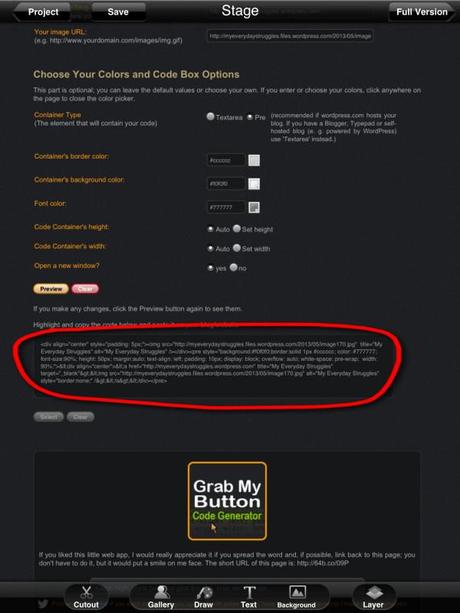
Voila! You now have your button with a grab code box displayed on your site.
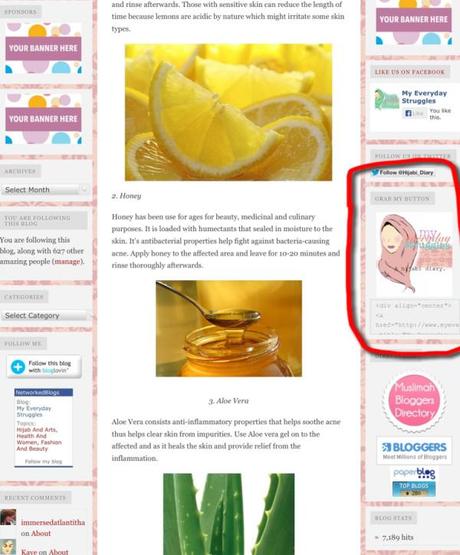
It is now easy to exchange link with other bloggers plus an additional website feel on your blog. I hope this post helps you generate your first button. Let me know how it works on your blog by leaving your comments below.
xoxo

