This is why I'm baking this Hanjuku Cheesecake. No doubt that it is a trending food in the recent social-media-sphere.
Hanjuku? If you search the meaning of "hanjuku" at Google, you will see that it is a Japanese term to described eggs that is half cooked or with semi-molten yolk.
Knowing this definition, you would assume that all Hanjuku foods are half cooked or have molten-like texture like the molten lava cheese tarts that I baked at here. Not exactly!!! This Hanjuku cheesecake is errr... sort of half-baked and doesn't have a runny molten texture! Unlike most typical non-Hanjuku fully baked Japanese cheesecakes, this cheesecake is "half-baked" with half the amount of eggs and other ingredients but contain the typical full amount of cream cheese. In another word, it is basically a fully-cream-cheese-loaded soufflé Japanese cheesecake that is baked with half of the other ingredients. Roger? So you can imagine... This cheesecake is fluffy like half-risen soufflé cheesecake and yet doubly loaded with creamy cream cheese... Yum! I must admit that it is a cheesecake heaven!
After tasting this lovely cake, I actually packed a few slices of it for my husband to share with his coffee kaki (meaning close friends that always hanging out together in Hokkien language) and he came home excitedly, telling me his kaki like the cake very much and one said that he will pay to buy this unique cheesecake!!! It is so nice to hear all these positive and appreciative comments. And I'm happy to know that there are people who are willing to buy my home-baked cakes! Does this means that I can start selling my home-baked cakes? Hmmm... Not too sure yet!!! LOL!
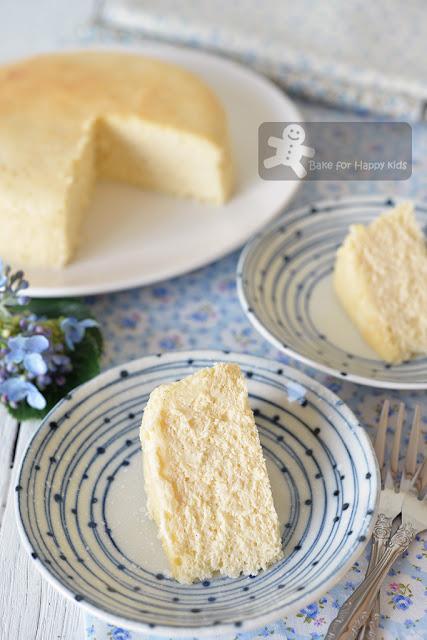
Hanjuku Cheesecake / Japanese Half Baked Cheesecake
Why is this Hanjuku cheesecake so unique and awesome?
If you scroll down to look at the recipe closely, you will see that this cheesecake is maximally packed with cream cheese and minimal packed with sugar, eggs and other ingredients. Less sugar? YES! This cake is NOT overly sweetened and so please do not reduce the amount of sugar any further.
Have you noticed that there is NO flour added in this cake? Yes that this cake is gluten free if you use wheat free corn flour to bake your cake and the amount of corn flour used is very minimal.
No flour and less eggs... this is why the cake has to be fully chilled, preferably overnight in order to stabilise its structure before slicing and serving.
Oh! Another thing... Like most Japanese soufflé cheesecakes, this cake has to be baked with steam baking to produce such moist and fluffy creamy crumbs. I know. I know. Some of you might ask if the cake can be baked without steam baking. Errr... Probably NO!!! I won't bake the cake without steam baking and won't expect anyone else to take the risk of baking the cake without steam baking. Cheers!
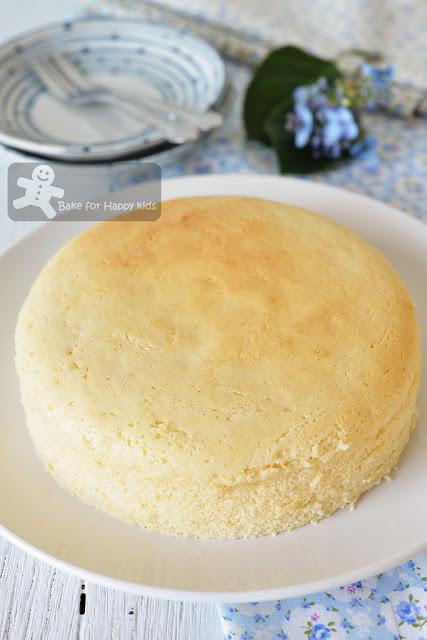
Unlike most Japanese soufflé cheesecake, this Hanjuku is half-risen...
Yet, it is fully packed with fluffy creamy crumbs!
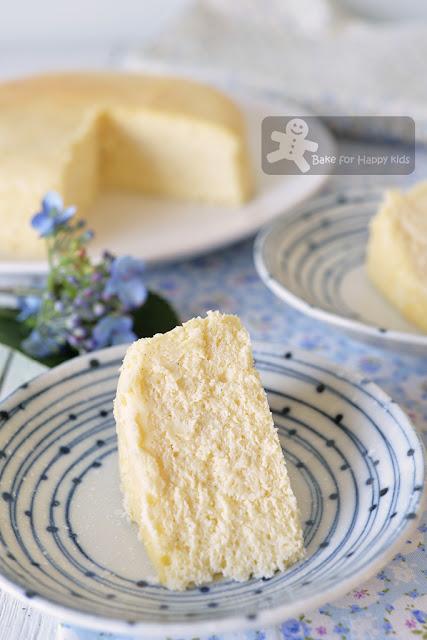
I can't stop admiring its moist semi-fluffy creamy texture.
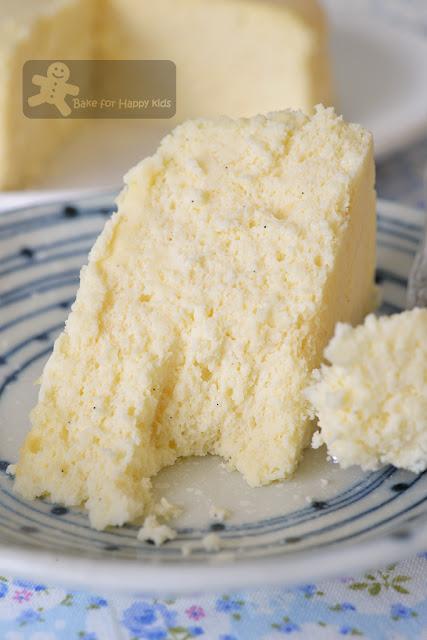
Every mouthful is so moist, creamy and rich! So yum!
Want to bake this lovely heavenly cheese cake? Here's a video showing how I baked mine.
Before proceeding to the recipe, I like to mention something...
It's time that I need a break!!! My family and I are going to Singapore and Beijing for our holiday! Yay!!!
If you wish to "come along" with us to Singapore and Beijing, please follow me at my Instagram @zoebakeforhappykids
Bye baking and blogging and I will be back soon to share more fabulous recipes in 3 weeks time.
IMPORTANT: Please use the exact weight. All ingredients except cream cheese, butter and milk must be at room temperature. Please DO NOT use fan forced oven to bake this cake.Makes one 14 cm (5.5 inches) round cake
Although this cake is small, it is rich and can serve up to 8-10 person.To bake a 20 cm cake, please use double these ingredients.
For the cream cheese mixture:200g cream cheese
25g unsalted butter20g milk30g egg yolk60g Greek yogurt with 10% fat, at room temperature3/4 tsp vanilla paste or extract
15g corn flour1/4 tsp salt
For the egg white mixture:70g egg white1/2 tsp lemon juice
50g caster sugarPreheat the oven to 150°C (NO fan forced setting!) or please see the below oven setting tips to know the right setting to use.Line the inside bottom of a loose bottom or springform pan with NO non-stick surface with baking paper. Do not line or grease the internal side of the cake pan. Wrap the outside bottom of the cake pan with foil to prevent the water for steam baking from seeping in. Place cake pan in the middle of a deep 35 cm x 25 cm (14 x 10 inches) baking tray. Set aside.Place cream cheese, butter and milk in a large mixing heat proof bowl. Place the mixing bowl over a saucepan of simmering water and make sure the mixing bowl is big enough to sit on the top of the saucepan. While heating, keep stirring the cream cheese mixture until it looks soften and combined. Remove mixture from the heat and set it aside to cool slightly for 5-10 mins. Do not discard the simmering water as you can use it later for your steam baking.Using a hand whisk, add egg yolks and yogurt gradually into the cream cheese mixture and whisk until mixture is just combined after every addition. Do not over-mix mixture. Then, whisk in the vanilla. Sift corn flour and salt into the cream cheese mixture and whisk until well incorporated. Pour mixture through a sieve to avoid having lumpy batter.Using an electric mixer with a whisk attachment, whisk egg whites and lemon juice at a low medium speed for at least 5 mins to stabilise the egg white mixture. Increase the whisking speed to the next higher speed. While whisking, add sugar gradually in 3-4 batches and continue to whisk at the next higher speed (medium speed) until soft peaks form. Please do not use high speed to avoid forming large and coarse bubbles. To stabilise the air bubbles in the mixture, decrease whisking speed to low speed and beat for another 1 mins.Using a hand whisk or a spatula, gently fold in the egg whites to the cream cheese mixture in 3-4 portions. It is ok to mix the 1st portion of egg white more vigorously into the cream cheese mixture but the subsequent portions must be folded in very gently. Make sure that most of the white is not visible after folding.Pour batter into the prepared cake pan and tap the cake pan gently a few times on your table top to remove excessive bubbles and use a skewer to draw a zigzag to remove air bubbles only on the surface in the batter.To set your oven up for steam baking, place a baking rack in the middle position (some ovens prefer to bake soufflé cake at a lower position - so you must know your oven) for your cake and another in the highest position for your heat shield. Place an empty baking tray on the highest rack as a top heat shield. Just before baking, pour 2 cups (500ml) boiling hot water (not more or less as the difference will affect the oven temperature) into the deep baking tray that contains the cake pan.Note: For me, I know that my current Ariston oven is typically warmer and so I'm baking my cake in slightly lower temperature which is 135°C instead of 150°C for 60 mins.Baking for 50-60 mins or until the top of the cake is firm enough. Remove the "top heat shield" baking tray at the highest position of the oven and continue to bake for another 5-10 mins or until the top of the cheesecake turns golden. I noticed that the cake won't brown too much on its top and so DO NOT over-bake cake!!! Ideally, the cake should be moist and creamy inside.Remove cake from oven and immediately drop the cake with the pan on at a height of about 30 cm onto the table top. This helps to prevent the cake from shrinking too much during cooling.Leave the cake to cool slightly for about 5 mins and unmould the cake immediately after removing it from the oven. Place the cake on a wire rack to allow it to cool completely. Transfer cake into a tall container. Cover (without having the cover or cling wrap touching the top of the cake) and chill the cake in the fridge overnight.Slice and serve the cake on the next day. Store uneaten cake in an airtight container in the fridge for 2-3 days.Happy BakingPlease support me and like me at Facebook...
