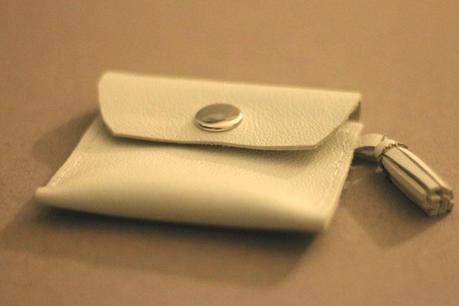
I’ve got some awesome DIYs coming up, and this DIY leather change purse I have to say, is one of my favourites. My last change purse, a gift from a friend, fell apart recently and I’ve been rummaging in my bag for spare change ever since. It’s perfectly easy if you follow the step by step, if you have any questions don’t hesitate to ask. The only really difficult bit is getting the needle through the leather, but I have a solution for that too…

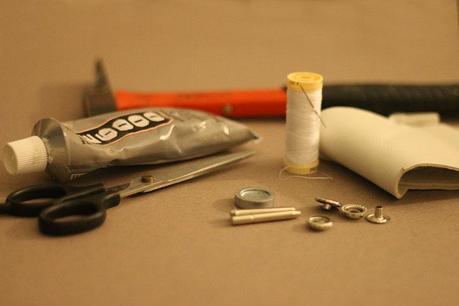
1. You will need : Leather around 9.5cm wide by 23cm long, or another material. This size fits a credit card. A Snap buttons set which you can buy at around £6 on Ebay with the attaching metal bits included. A leather needle, scissors, glue for the tassel, and a rubber headed hammer. If you don’t have a rubber headed hammer like me, cover a normal hammer with a thick layer of cloth.
It’s not in the picture but a quick-unpick, a ruler, a pencil and a chopping board definitely help sewing through the thick leather.

2. Cut all the pieces needed for the purse, you need:
- For the purse : a large rectangular piece around 9.5 cm by 20cm long. I rounded the corners at one end to make it look a little like a letter.
- For the tassel : a section around 3cm wide by 3cm long. Cut a small piece to create the loop which will attach the tassel to the purse, I used a little chain though. For directions on making the tassel click here.
- For the loop on the side of the purse : A small section about 4cm long by 0.5cm wide.
3. Following the instructions on the snap button set, pierce a hole with the equipment provided and attach the half of the snap button that would appear inside the purse (see photos below). Alternatively, you could attach a pretty button and cut a button-hole.
4. Here is where I would add the step with the quick-unpick. I quickly realised it was difficult to sew a straight line through leather so as a solution I marked where I wanted the holes with a pencil and ruler using a 3mm seam allowance with 5mm distance between each hole. I then pierced the leather with the quick-unpick on a chopping board to avoid making holes in my desk. I also pierced two holes on each end of the loop to attach it to the purse.

5. Using a double running stitch sew one side. With a double running stitch you sew in and out with the needle until you get to the end then you turn back round on yourself and fill in the gaps again sewing in and out.
6. On the other side repeat step five attaching the loop around 1.5cm from the top. Repeat step 3, attaching the top half of the snap button.
There you have your DIY leather change purse! There are quite a few steps but don’t get disheartened, the whole project took me about an hour and a half in front of the TV. The options are endless, you can use any material, not necessarily leather and you could always change-up the buttons!
Take care,

