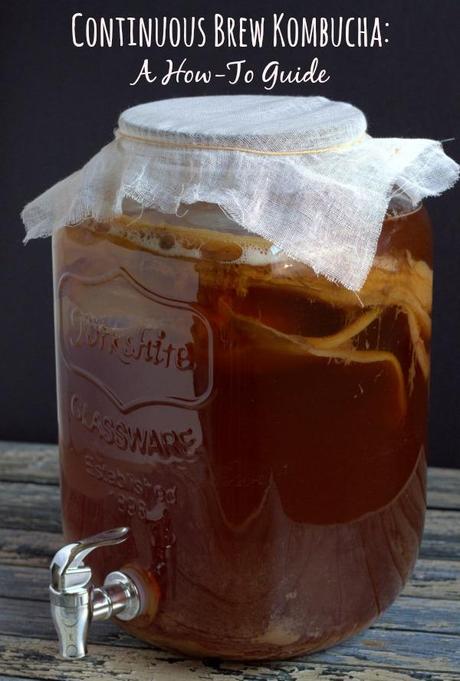
There has been a lot of talk in the media recently regarding the health benefits of fermented foods and probiotics. This is great news for me as my friends and relatives have stopped giving me sideways crazy-lady glances and started to come to me for advice. After having two people within twenty-four hours ask me about my Continuous Brew Kombucha, I thought I should write a post on it to save me repeating myself.
What is Kombucha & Why Should I Drink It?
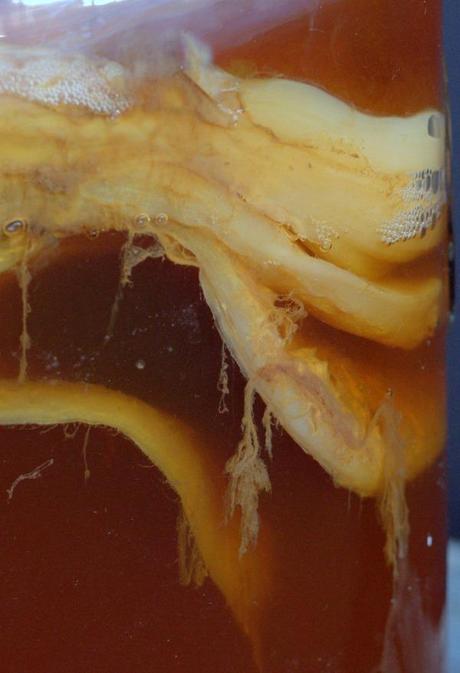
Kombucha is a refreshing probiotic-rich drink produced by fermenting sugar-sweetened tea. The tea is fermented by a SCOBY (Symbiotic Culture of Bacteria and Yeast), which is also referred to as the mother, a mushroom or (in my house) 'the alien blob'. They are not pretty to look but are certainly a conversation starter.
Kombucha is purported to have significant health benefits, and is supposed to cure any number of health problems. I drink it because I like the taste, and I find it a simple way to get my daily dose of probiotics. I do find that it helps with my digestion.
The Continuous Brew Method
I first started brewing Kombucha in a large glass jar. Each new batch required me to remove the SCOBY, drain off the fermented tea, replenish the brew, then replace the SCOBY to start the next batch. It was a complete phaff, and generated a lot of dishes.
I now use the Continuous Brew method, which uses a large glass or ceramic drink dispenser with a tap at the bottom. Fermented tea is drawn off the bottom of the brew using the tap, and then fresh sweetened tea is poured into the top to replenish the fermentation process. It's that simple. You can draw off as little or as much fermented tea as you like before replenishing the brew with new tea, and I find this to be a significantly easier process.
Another major benefit of the Continuous Brew method is that the SCOBY remains in the fermentation vessel the entire time, which reduces the risk of contamination with moulds and fungi.
How to Brew Kombucha Continuously
Everybody has their own way of brewing Kombucha. This is the method that I use. Feel free to tweak it or change it to suit yourself. So long as you end up with fermented tea at the end of the process, your method is sound.
To start your Continuous Brew, you will require a SCOBY and at least one cup of fermented tea. These can be purchased online, although the best way to acquire one is to find somebody who already brews their own Kombucha.
Add the SCOBY and its liquid to the fermenting vessel and set aside. Place 5 -6 black tea bags in a two litre jug and add one litre of boiling water. Allow the tea bags to steep until the brew is cold, then squeeze out the tea bags and discard. Add 1/2 cup of raw sugar and one litre of filtered cold water. Stir to dissolve the sugar, then pour the sweetened tea into the brewing vessel.
To fill my drink dispenser initially, I repeated this process over a week until the container was full. This allowed each batch to ferment slightly before the next addition, rather than swamping my small SCOBY all at once.
Cover the mouth of the vessel with cloth or muslin, and secure with a rubber band. Do not put a lid on the jar, as Kombucha requires oxygen for fermentation. Set the vessel aside somewhere it will not be disturbed, and wait.
Kombucha activity is very temperature dependent, so the tea will ferment faster in warmer weather. Start tasting the brew once a new SCOBY has formed on the top of the liquid. Mine takes about one week in summer and slightly longer in winter. The brew is ready when the taste is to your liking. I prefer mine to be quite acidic but The Princess likes it a little sweeter. If the brew is too sweet, allow it to ferment for a further day or two then taste again.
Once I am happy with the taste, I draw off a couple of litres using the tap at the bottom of the vessel, then brew more sweetened tea as above and add this to the top of the vessel.
This process can continue indefinitely, although it may be necessary to clean the vessel occasionally to prevent spent yeast cells blocking the tap.
Secondary Fermentation
Flavoured Kombucha is available commercially, although you can flavour Kombucha at home for a fraction of the cost. This process, which adds flavour to the original fermented tea, is known as secondary fermentation. I have just started to experiment with secondary fermentation myself, and have used freshly squeezed and commercial juices to great effect. One of my favourite brews to date used crushed frozen berries in the Kombucha, which I strained out prior to drinking.
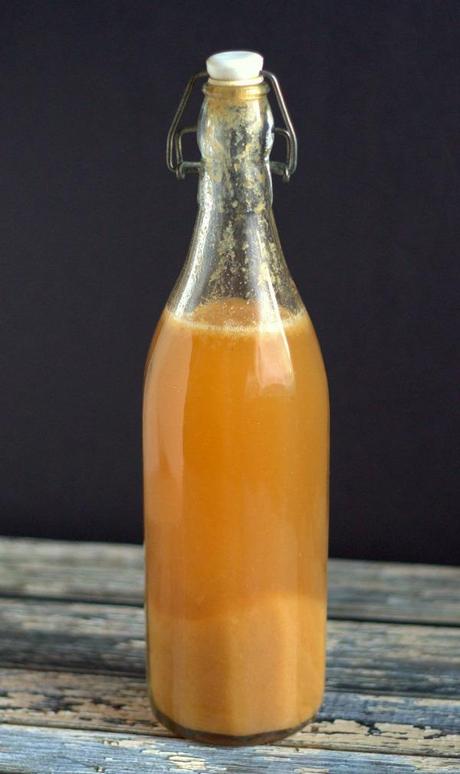
To create a secondary ferment, fill a flip top bottle one-third full with juice, then top this up with unflavoured Kombucha. Seal the bottle and leave to steep on the benchtop for a few of days. I 'burp' the bottles every so often, especially if the Kombucha looks quite active, to prevent them exploding. Transfer the bottles to the fridge after a couple of days.
I strain my secondary ferments before drinking, although this is personal preference and certainly not necessary. I just don't like 'bits' in my drinks.
Some Final Thoughts
Use green or black tea for your initial Kombucha brew. Herbal teas will not work for the initial brew, but can be used to flavour your secondary ferment.
I use organic raw sugar to sweeten my tea. I have heard of rapadura, maple syrup or honey being used to sweeten the tea, although I have also read anecdotal reports that this can lead to the death of the SCOBY. I prefer to not take the chance.
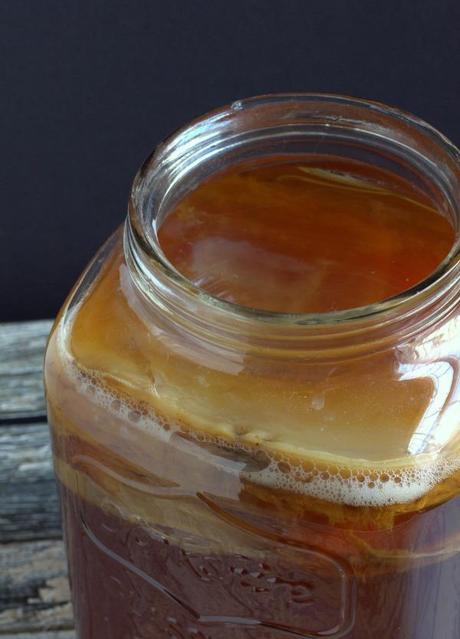
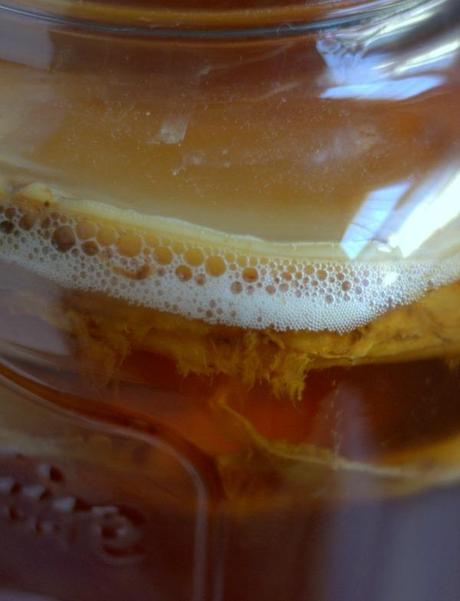
A new SCOBY forms every time fresh sweetened tea is added to the vessel. Initially the top of the brew will seem covered in pond scum, yet this is perfectly normal. Over a few days this layer will thicken into a creamy white mat on the surface of the liquid. Eventually there will be thick layers in the jar, at which point I remove some of the SCOBY's to make room for more tea. These SCOBY's can be composted, but are better shared with friends. Just make sure to include at least a cup of liquid with the gifted SCOBY.
Contamination of a batch is unlikely but it can happen. If grey, fuzzy mould starts to form on the SCOBY, discard the entire batch, including the SCOBY, and start again with a new SCOBY. As a new SCOBY forms, patches of what looks like white mould start to appear on the surface. However, this is related to the formation of the new SCOBY and is nothing to worry about.
From time to time, brown strands can be seen hanging off the SCOBY. These strands form from spent yeast cells and are a normal part of the fermentation process. Eventually they will drop to the bottom of the vessel, and form a brown filmy layer. This will not need to be removed unless it starts to interfere with the operation of the tap.
Further Reading
Kombucha is just one small aspect of a huge range of fermented foods and drinks. If you are interested in further researching this area, I think there is no better place to start than the following books by Sandor Ellix Katz.
Wild Fermentation: The Flavor, Nutrition and Craft of Live-Culture Foods.
