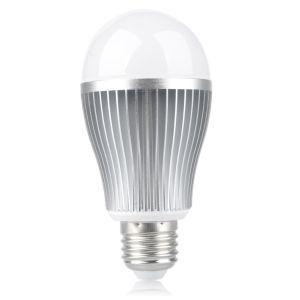
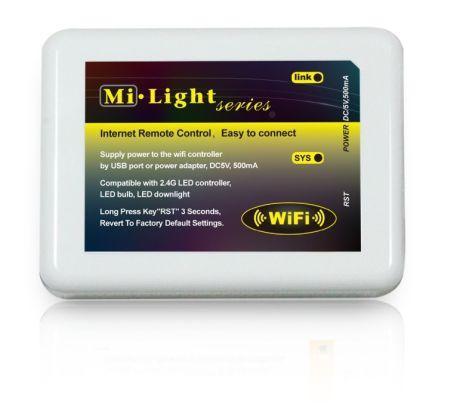
 We have seen in a previous article how nice it is to control the lights in your home using the Raspberry Pi and MiLight/LimitlessLED/EasyBulb Wi-Fi enabled LED bulbs. We have also seen how you can do some automation, like replacing your alarm clock with automatically turning on the light bulbs, to wake up more gently. But there is one important device that needs to be set up correctly for these things to work well. As we know, the MiLight/LimitlessLED/EasyBulb wireless LED bulbs do not actually contain a Wi-Fi receiver. They respond to radio signals (over 2.4 GHz) which are sent to them either by a simple remote control or by the MiLight wireless bridge. So to enable controlling them over Wi-Fi, the data must go through the wireless bridge.
There are two possible problems with the MiLight wireless bridge in its default configuration, as it comes out of production:
1. It uses a dynamic IP address inside the LAN.
2. In some systems the wireless bridge is trying to communicate with the outside world, which causes the lights to automatically turn off again and again.
Assigning a static (fixed) IP address to the MiLight/LimitlessLED/EasyBulb wireless bridge

By default the wireless bridge uses a dynamic IP address allocated to it by your wireless router. This is not a problem per se, it is actually a great thing, as long as you are controlling the bridge with your phone, which automatically finds the device, because you don’t have to go through the hassle of configuring it. But if you happen to be an advanced user and wish to send commands to the MiLight wireless bridge from a computer, like the Raspberry Pi, then you have to address it with its IP address. And if that IP address is allocated dynamically, meaning that it might change every time the router or the bridge itself reboots, this becomes a problem.
So we need to allocate a static (fixed) IP address to the bridge. If you have a router which allows you to map devices (MAC addresses) to IP addresses, then you can simply go into the router’s configuration page (usually you can do this by accessing 192.168.1.1 from a web browser), find the section which allows these mappings to be defined, find the MiLight bridge in the list of devices connected to the router (using its name) and assign it the IP address of your choice.
Unfortunately some routers don’t allow mapping devices to fixed (static) IP addresses. Not all hope is lost in this case, because the devices can request a fixed IP address for themselves. The MiLight wireless bridge V3 (black label) can do this too:
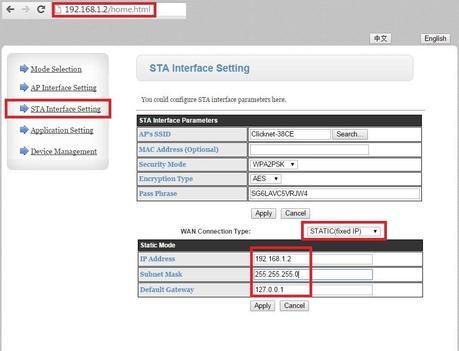
1. Access the wireless bridge’s configuration page. First you have to find its current IP address by looking at the list of devices connected to the router. After that you can access the config page by going to MiLight_IP/home.html in you web browser. For example if you see the MiLight bridge in your router’s device table with IP address 192.168.1.2, then go to 192.168.1.2/home.html in your browser.
2. If the config page is in Chinese, you should see a small button labeled “EN” in the top right corner, with which you can switch to English.
3. Go to the “STA Interface Setting” section.
4. Change the “WAN Connection Type” to “static (fixed IP)“.
5. Fill the 3 fields that appear:
5.a. IP address: the desired fixed (static) IP address (for example 192.168.1.2).
5.b. Subnet mask: a suitable subnet mask, for example 255.255.255.0
5.c. Default Gateway: the IP address of your default gateway.
6. Click “Apply“.
7. Power off (unplug) the MiLight wireless bridge and wait a few seconds.
8. Power on (plug back in) the wireless bridge. after a few seconds the “Link” LED should light up and everything should work fine. The bridge will now always have the static IP address that you have assigned to it.

Finally, if your router does not allow assigning a static IP address to the MiLight bridge and you have a V4 bridge (not V3), then you plain out of luck, because the feature of being able to configure a fixed IP address has been disabled in the new version of the bridge (V4 – green label). In this case you cannot use the bridge with a fixed IP address.
Preventing the wireless bridge from communicating with the outside world and turning the lights off automatically

It seems that the MiLight wireless bridge is sometimes attempting to communicate with the outside world (send/receive data from outside the LAN). In some systems this has the unwanted side effect of automatically turning off some MiLight bulbs after a few seconds or minutes after they have been turned on. And this happens again and again, as the bridge is trying to communicate with the outside world (by the way, it’s a good question why it tries to do this and what it’s sending/receiving…). This means that we need to prevent the MiLight wireless bridge from being able to communicate with devices outside the LAN.
If your router allows it, the simple solution is to block the wireless bridge in the router’s firewall section from accessing addresses outside the LAN. If the router does not have this feature, but you have a V3 MiLight bridge, you can still do this by taking away from the bridge the knowledge of where the gate to the outside world is. In other world, giving it a default gateway address which either does not exist or points back into the LAN. Follow the steps from above, configure the bridge to use a static IP address and in the Default Gateway field (5.c.) simply type 127.0.0.1 or some not used IP address in the LAN.
Again, if your router cannot block the MiLight bridge from going outside the LAN and you have a new bridge (V4, not V3), then you’re out of luck, because the new bridge (V4 – green label) does not allow this configuration to be made.
I personally sincerely hope that in the next versions of the MiLight/LimitlessLED/EasyBulb wireless bridge the feature of configuring the bridge from the web browser will be re-introduced and it will allow again to be configured with a static IP address. I don’t really understand why they have removed this feature in the first place… Well, anyway, if your wireless bridge can be configured using one of the above methods, then you can easily control it from a computer (like the Raspberry Pi) and enjoy automating the lights in your home. Have fun!


