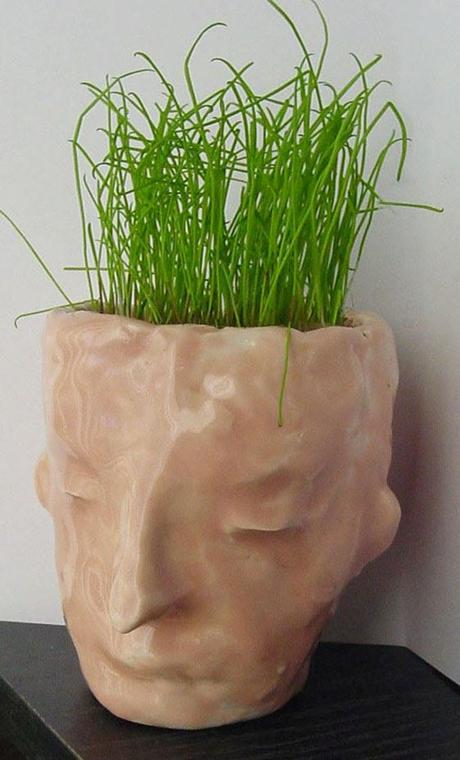
 Making this ceramic planter and then planting seeds for hair
makes the growth process a lot more fun.
1. Use a wire cutter to make about 3/4" thick slabs cut from a block of
clay. Each student uses a plastic drinking glass (about 3.5"
diameter) to cut a circle from one corner of the slab for the base of
the planter. The rest of the clay is used to make the largest rectangle possible, approximately 11" x 4".
2.
Once this rectangle of clay was wrapped around the circle base, the
students blended the edges to make it look like a smooth,
closed tube. A bit of soft wet clay is attached to
look like a nose, and the eyes and mouth are added or formed by
pinching. When complete, a drainage hole is punched in the bottom
circle with a drinking straw. The clay needs to dry in the sun for several
days.
3. Planters are fired in a kiln.
Making this ceramic planter and then planting seeds for hair
makes the growth process a lot more fun.
1. Use a wire cutter to make about 3/4" thick slabs cut from a block of
clay. Each student uses a plastic drinking glass (about 3.5"
diameter) to cut a circle from one corner of the slab for the base of
the planter. The rest of the clay is used to make the largest rectangle possible, approximately 11" x 4".
2.
Once this rectangle of clay was wrapped around the circle base, the
students blended the edges to make it look like a smooth,
closed tube. A bit of soft wet clay is attached to
look like a nose, and the eyes and mouth are added or formed by
pinching. When complete, a drainage hole is punched in the bottom
circle with a drinking straw. The clay needs to dry in the sun for several
days.
3. Planters are fired in a kiln.4. Students paint the planters with skin tones glazes, and they are fired again. 5. Lastly, peat moss and grass seeds are added to fill the planters. My sample has simple grass seeds, but it would be fun to see what kind of curly hair could be produced with other seeds as well.
