Having been in this flat now for over 8 months, I can say that I’ve spent the past few feeling as though I’m some kind of ‘live-in maintenance man‘. When something’s broken or has been in need of improvement, I’ve offered to repair or replace it (unless it’s electrical, of course). I quite enjoy a bit of DIY (working to my own rules and at my own pace) so this doesn’t bother me too much. Until recently, I spent several weeks living in a near-building site-like state as I attempted to repair and redecorate the main living room walls.
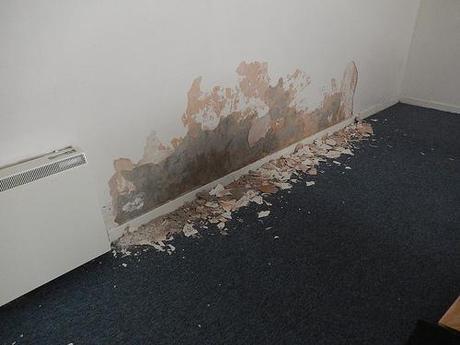
Before…
By far, this has become my proudest achievement in this property to date:
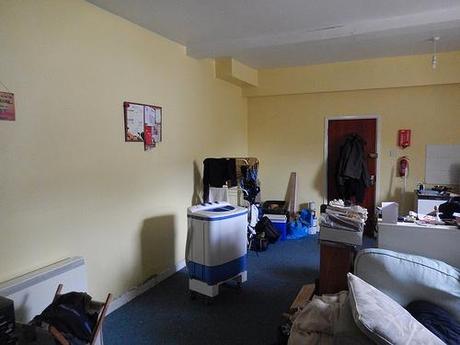
I am no plasterer and I’ve never been keen on painting but a couple of coats of Dulux’s lemon tropics has, for me, transformed the feel of this previously overly-magnolia property.
But today, I’m going to share with you some recent improvements I’ve made in the bathroom.
I’m quite certain I showcased the Ikea mirror in a previous post and so, I won’t repeat that here. A couple of my latest additions came unexpectedly on a walk around Lidl.
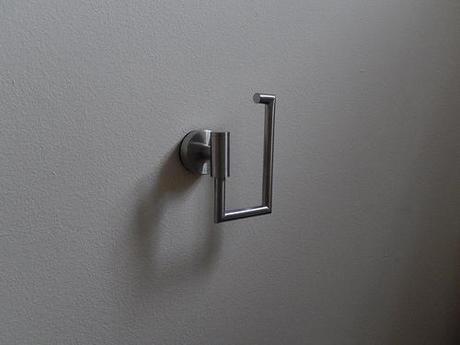
I was spared an imminent trip to the hardware store immediately after my food shop when I spied a shower hose in one of the racks for something like £3.99. Next to that, they had a toilet roll holder going for the same kind of low price. I passed on the towel rail as I currently manage simply by slinging my towels up and over the shower cubicle.
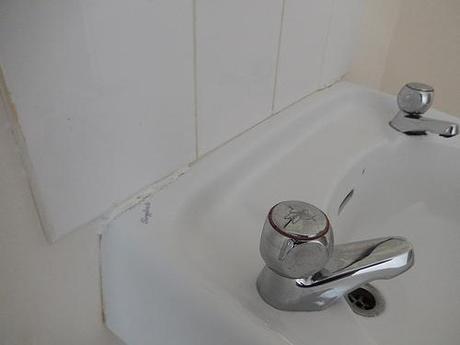
Behind the sink, I noticed some time ago that the sealant was absent, if not peeling away in other areas. So, with that up for renewal, I bought a cartridge of the white stuff and also took a closer look at the seal surrounding the shower base, which was not only loose in small areas but black and mould-ridden in others.
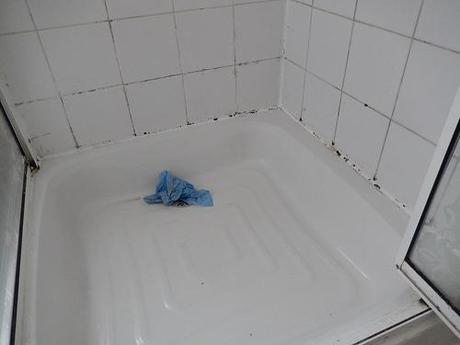
It took a Stanley knife and not a lot of effort to peel it away. However, it felt about as disgusting as the thought of manually unblocking a used toilet… Without a brush, stick, plunger or rubber gloves!!
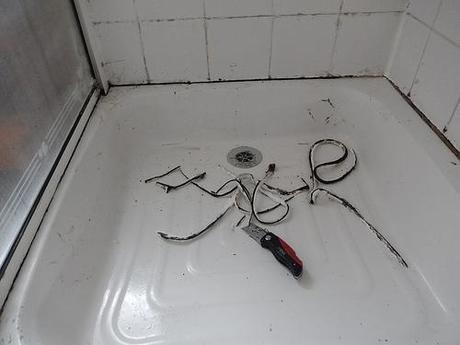
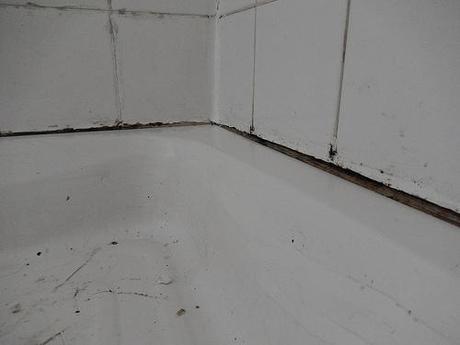
There was quite a void to fill along one edge and it took two applications in order to completely close that gap.
My primary reason for (lightly) investigating the shower was because I noticed another damp issue down one edge of the cubicle, on which the door is hinged:
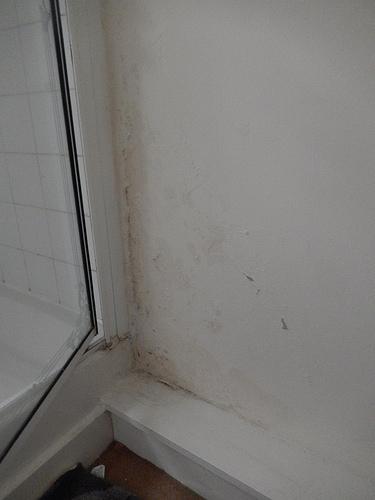
Taken this evening, after a shower.
There’s clearly been a problem here for some while. It appears as though it was painted over long before I moved in and spotted the ‘bubbles’ forming. I don’t intend to give myself too much work and so I won’t be redecorating this room. Having replaced the sealant, it’s fair to say that the dampness is less frequent but still somewhat persistent. It seems to arise after the shower’s been used. Bristol Water came out a few months ago to perform a leak check of the property without finding one and so, I’m wondering whether it could be an issue with the grouting, if not a leak in the seal elsewhere.
I’m confident water’s not splashing over while I’m in there. These patches are barely wet to the touch; a dust-like paint residue forms on your finger. Reading several internet forums, I noticed there appears to be a common fault with shower doors that could be adding to this.
Thanks for reading.
